Articles / Guidesupdated for DaVinci Resolve 21.0.2 (July 2026)
DaVinci Resolve Render Cache Explained: Smart vs. User Mode
Quick answer
DaVinci Resolve's render cache pre-renders effects-heavy clips into playable files. Smart mode automatically caches processor-intensive formats and effects with no input from you. User mode caches only clips you manually flag, giving more control but requiring more attention. Both live in Project Settings under Optimized Media and Render Cache, and both speed up playback, not decode.
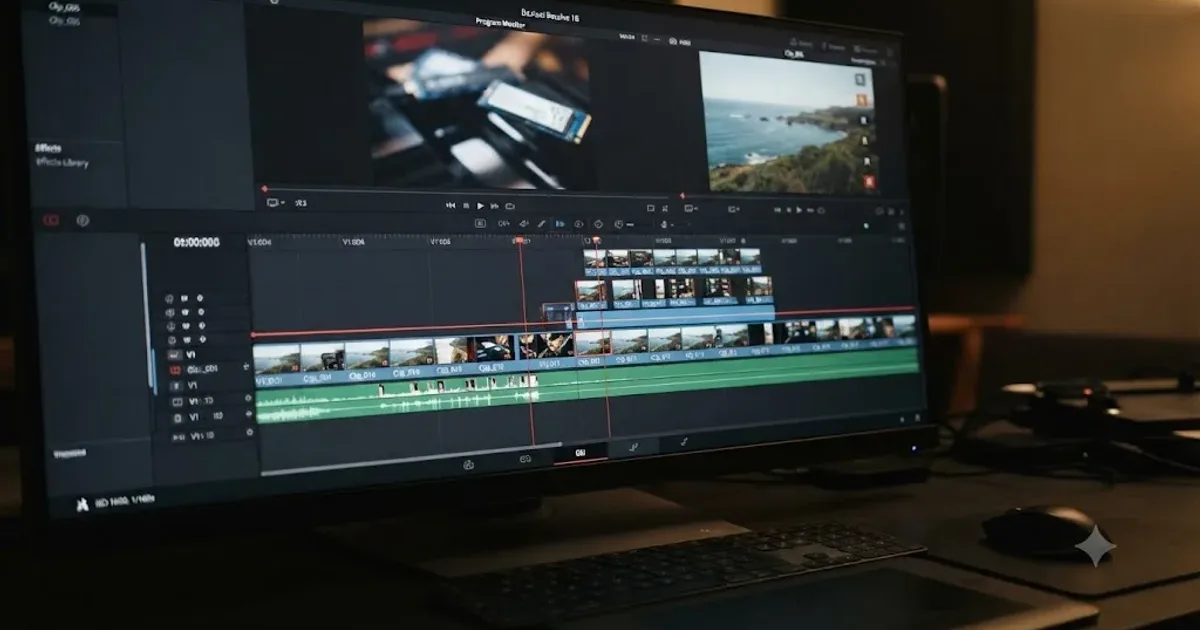
Render cache is the setting everyone turns on the first time playback stutters, and almost nobody understands afterward. It doesn't decode your footage faster. It doesn't touch your camera codec at all. It pre-renders the stuff you added on top of that footage, so Resolve can play it back instead of recomputing it every single frame.
Here's what it actually caches, why Smart and User mode disagree about what counts as expensive, and the settings that decide whether your cache helps you or just eats your disk.
What is DaVinci Resolve's render cache?
Render cache is the behind-the-scenes creation of new media, with your effects and grading already baked in, that Resolve plays back in real time in place of the original clip. Instead of running your color corrections, noise reduction, or Fusion composition live on every frame you scrub past, Resolve computes those effects once, saves the result, and hands you the finished file from then on.
That's a different job from Optimized Media or Proxy Media, which swap your original camera file for an easier-to-decode stand-in. Our playback stuttering guide covers that side of the equation in depth. Render cache doesn't care what codec you shot in. It cares about what you did to the footage after you imported it: a heavy grade, a stack of nodes, a Fusion comp, a compound clip.
Render cache does not decode footage faster. It skips the decoding and effects processing entirely by handing playback a pre-built file instead. That distinction explains almost every confusing thing about this feature. It's why caching a plain, ungraded clip does nothing, and why caching a Fusion-heavy title card can turn a crawl into instant, smooth playback.
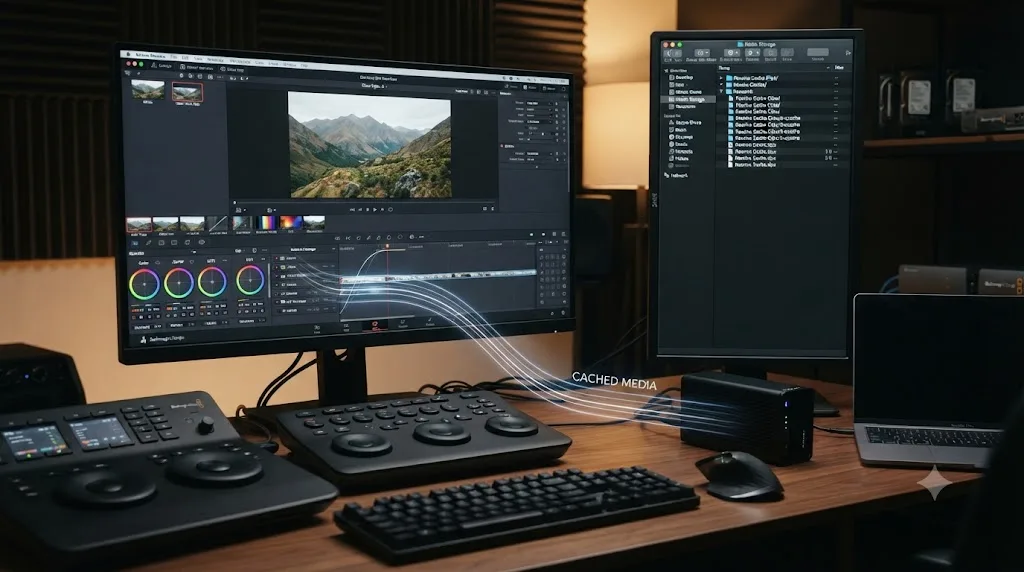
What's the difference between Smart Cache and User Cache?
This is the setting that confuses most editors, and it's a genuinely different philosophy, not just a stricter or looser version of the same thing.
Per DaVinci Resolve's reference manual, choosing Smart "triggers a variety of automatic caching behaviors designed to optimize playback." In Smart mode, Resolve automatically caches clips in processor-intensive formats like H.264, H.265, DCP, JPEG2000, and camera RAW, along with clips carrying a speed effect or a Fusion composition. On the Color page, it automatically caches any node using Motion Blur, Noise Reduction, or a Resolve FX or OFX plugin. You don't flag anything. Resolve decides for you, based on what it already knows is expensive.
User mode flips that entirely. The manual is explicit that this mode "does not automatically cache clips in processor-intensive formats." Nothing gets cached until you manually flag a clip or a node. Project Settings does offer three checkboxes that soften that rule, letting you auto-cache transitions, composites, and Fusion Effects even in User mode, and of the three, only "Automatically cache Fusion Effects in User Mode" ships turned on by default.
Smart Cache decides what to cache for you. User Cache caches nothing until you tell it to. Neither is objectively better. They're built for different machines and different tolerances for background disk activity.
| Smart Cache | User Cache | |
|---|---|---|
| Who decides what caches | Resolve, automatically | You, by hand |
| Best for | Slower machines, mixed footage, hands-off editing | Fast machines, targeted problem clips |
| Disk behavior | Caches in the background as you work, sometimes more than you need | Caches only what you flag, so it stays lean |
| Auto-caches by default | H.264/H.265/RAW/DCP/JPEG2K, speed effects, Fusion clips, Motion Blur, Noise Reduction, ResolveFX/OFX nodes | Fusion Effects only, unless you enable the transitions/composites checkboxes too |
| Risk | Caches things you didn't need cached, burning disk space and time | Forgetting to flag the clip that's actually causing the stutter |
How do you turn on Render Cache and pick a mode?
It's one menu, and it's easy to miss because it lives next to Optimized Media rather than somewhere obviously labeled "performance."
Open File, then Project Settings, then Master Settings, and find the Optimized Media and Render Cache section. Render Cache has its own dropdown there, set to None, Smart, or User. None is the default on a fresh project, which is worth knowing, because it means every performance problem you haven't specifically diagnosed as a caching one is running with no cache at all.
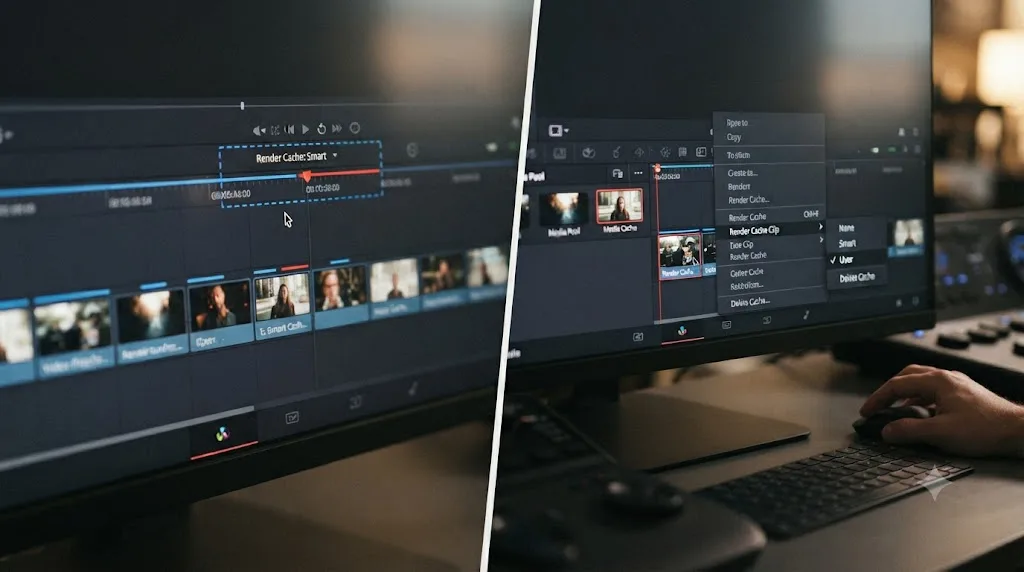
Switch it to Smart if you want to try the automatic route first. Watch what happens over the next few minutes of editing: DaVinci Resolve begins rendering flagged clips in the background, either during playback pauses or continuously if you've enabled background caching. If you'd rather control it directly, set it to User, then right-click a stuttering clip in the Timeline or a heavy node on the Color page and flag it for caching yourself.
The howto panel above walks through the full sequence, including the cache format and cache location settings covered next, both of which matter more than the mode toggle itself once you've made your first choice.
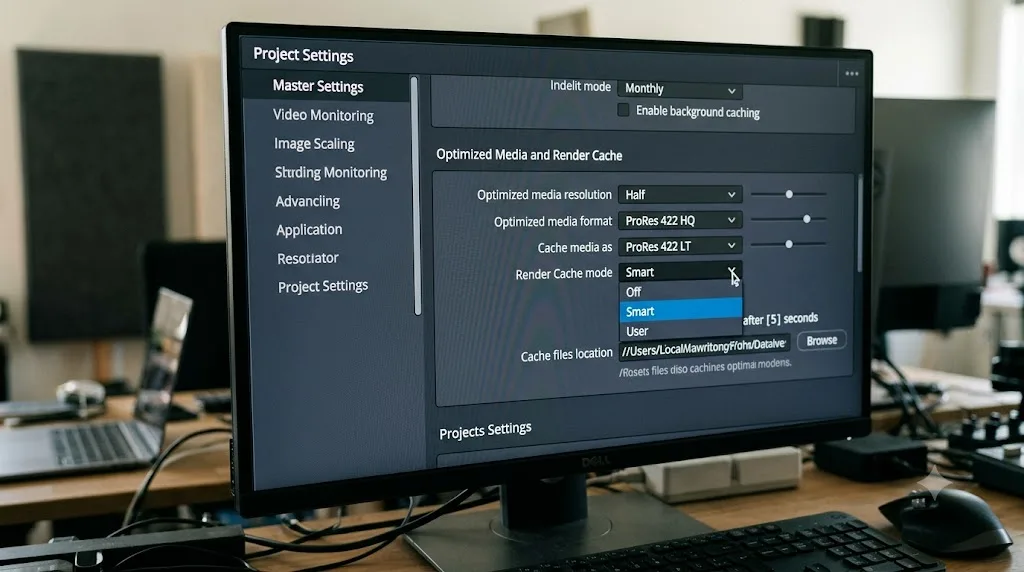
What cache format should you use, and does it hurt quality?
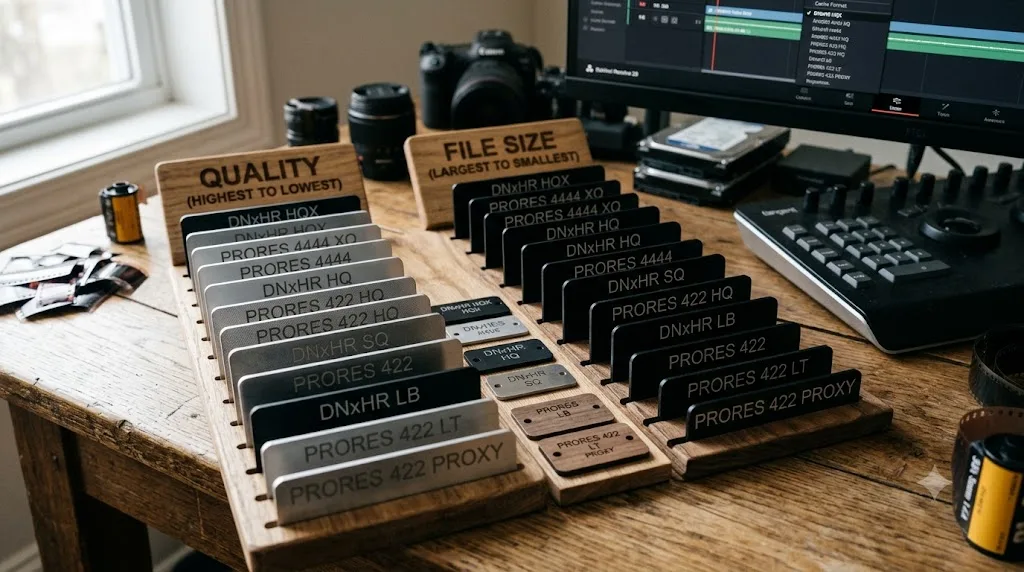
It can, if you pick carelessly. The manual's own advice is direct: use "16-bit float, ProRes 4444, ProRes 4444 XQ, or DNxHR 444 if you plan on grading using cached media." Those formats preserve out-of-bounds image data and alpha channels, which the manual notes matters "particularly true for HDR grading." An 8-bit cache format doesn't have the headroom to hold values above white or below black that your grade might still be pulling back, so caching into one can quietly bake in clipping that wasn't there in the source.
Cache format is a grading decision as much as a performance one: an 8-bit cache can silently throw away highlight and shadow detail your grade was built to use. If you're only caching for editorial playback on already-finished, already-graded footage, that risk barely matters. If you're caching mid-grade on a project with real dynamic range to protect, it matters a lot.
| Cache format | Bit depth | Best for | Tradeoff |
|---|---|---|---|
| DNxHR SQ or ProRes 422 | 8 or 10-bit | Editorial playback, no active grading | Smallest files, fastest to generate |
| DNxHR HQX or ProRes 422 HQ | 10-bit | Most color work | Good balance of quality and disk use |
| DNxHR 444 or ProRes 4444 | 10 or 12-bit, alpha | Grading, compositing, HDR | Largest files, most faithful to source |
| Uncompressed 10 or 16-bit | 10 or 16-bit | Maximum fidelity, short sequences | Enormous file sizes, only for small ranges |
Windows editors typically pick a DNxHR variant, and Mac editors typically pick the equivalent ProRes variant, mirroring the same platform split that applies to Optimized Media. Whichever you choose, set it once at the project level rather than adjusting it per clip. Project Settings applies the Render Cache Format across the whole project, separate from whatever format you picked for Optimized Media.
What do the colored bars above your clips actually mean?
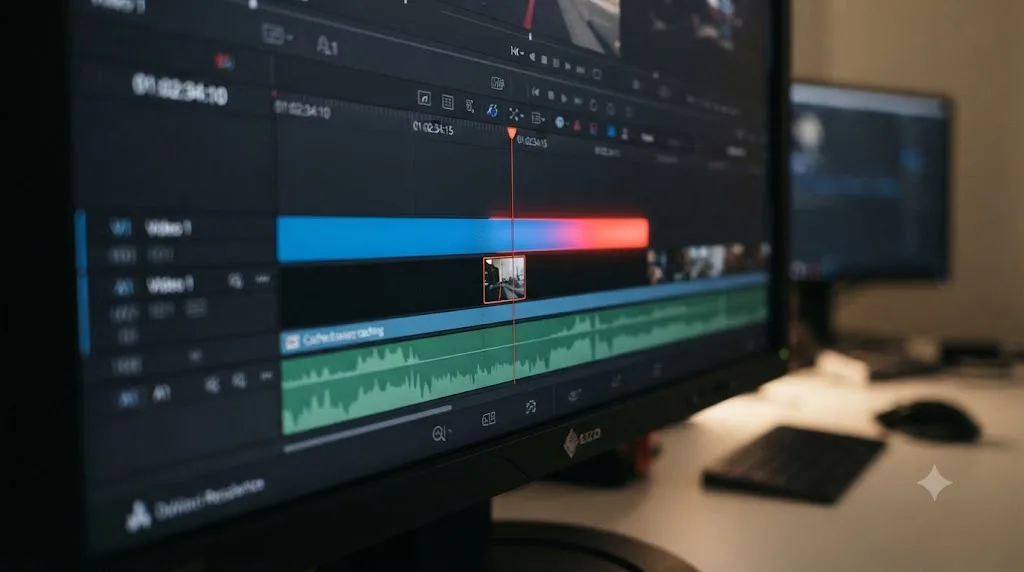
They're the fastest way to check whether caching is actually working, and most editors never notice they change color. Per TourBox's walkthrough of the caching process, a red bar appears above clips that need caching, whether because they're processor-intensive or because you just flagged them, and that bar turns blue once the cache for that section finishes and is ready to play back in real time.
The render bar above a clip turns from red to blue, not because your computer got faster, but because Resolve stopped asking it to do the work live. That's worth internalizing before you go chasing a performance problem that's already solved. If a section plays smoothly and its bar is blue, the cache is doing its job. If a section still stutters and its bar is red, the cache hasn't caught up yet, or that clip was never flagged for caching in the first place.
This is separate from the small performance indicator in the top-left corner of the viewer, which reflects your system's real-time playback headroom moment to moment rather than any specific clip's cache status. A blue render bar with a red performance indicator usually means something else on the timeline, outside the cached section, is the actual bottleneck.
Can you cache one clip or one node instead of the whole timeline?
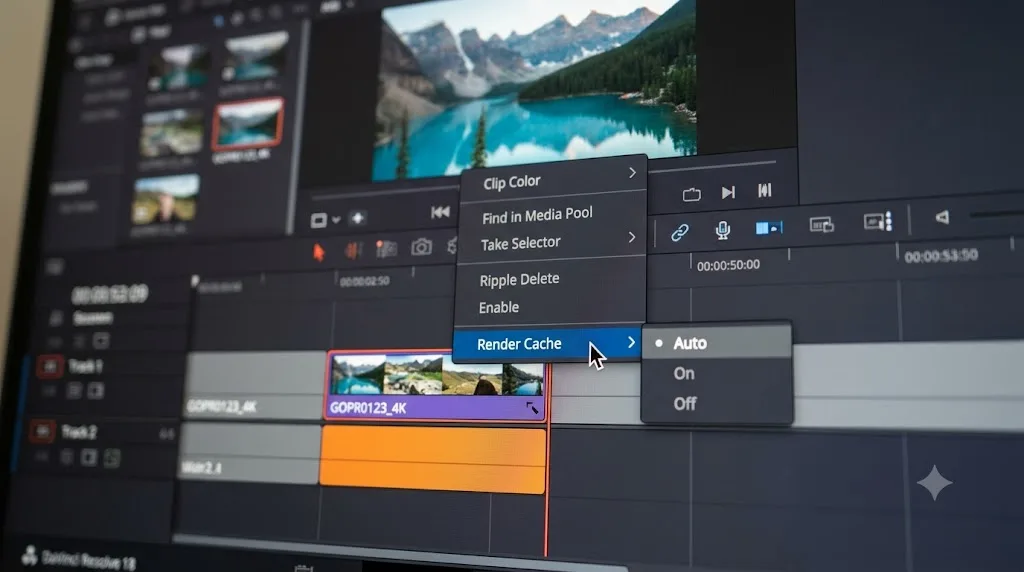
Yes, and this is the part of render cache most editors never touch, even though it's the difference between a lean, targeted cache and one that eats your whole drive. Right-click a clip in the Timeline and open the Render Cache Fusion Output submenu, or right-click a node on the Color page, and you get three choices, per the reference manual's section on Fusion output caching:
| Setting | What it does |
|---|---|
| Auto | Cached only in Smart mode, and only if the clip's format or a speed effect qualifies it |
| On | Cached in either Smart or User mode, regardless of format or effects |
| Off | Never cached, in either mode |
That table is where Smart and User mode actually meet. Auto defers to whatever Smart mode already decided. On overrides that decision and forces caching no matter what. Off does the opposite, exempting a clip even if Smart mode would otherwise have flagged it, which is useful for a clip you know plays fine and don't want competing for cache disk space with something that actually needs it.
Node-level caching on the Color page works the same way, one level deeper. Cache a single node in your grade, say a heavy temporal noise reduction pass, and Resolve only recomputes the nodes after it, not the whole stack from scratch. Our noise reduction settings guide covers why Temporal NR in particular is worth caching the moment you've dialed in its settings: it's one of the most GPU-intensive tools on the Color page, and re-running it on every scrub wastes real time for a result that isn't changing.
Does render cache speed up or slow down your final export?
Both, depending on when you look. Generating the cache costs time up front, the same way generating Optimized Media does. But once it exists, it can genuinely shorten your final render, not just your scrubbing.
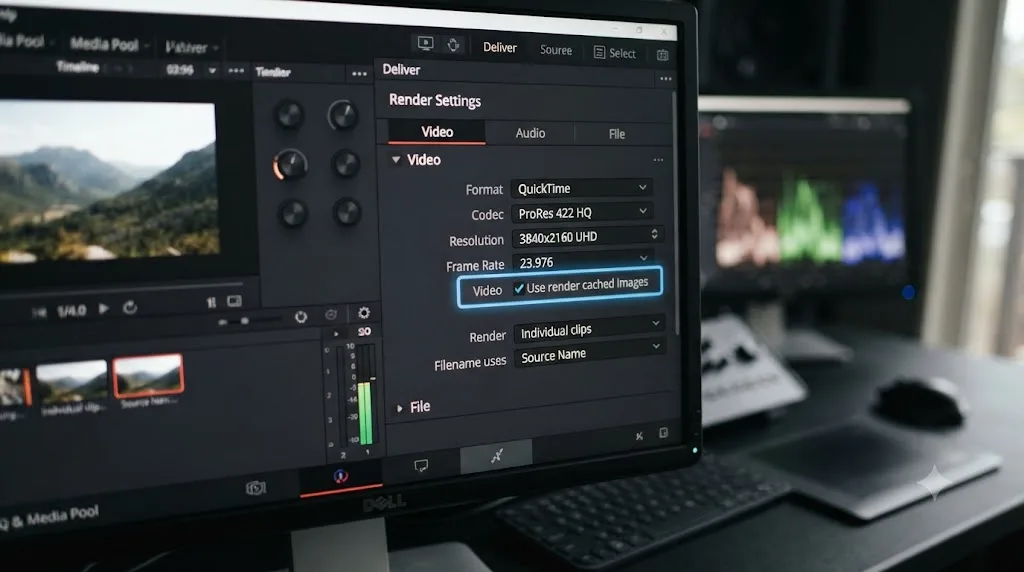
On the Deliver page, under Render Settings, there's a checkbox labeled Use Render Cached Images in the More Options section. Per the manual, enabling it lets Resolve "write media directly from the cache, rather than re-rendering the effects from scratch, in order to save rendering time when you output your project." If you've already cached the heavy sections of your timeline while editing, that work doesn't need to happen twice at export.
The manual also flags the obvious catch: it's "advisable to set the cache format to a suitably high-quality format to guarantee the best results" if you plan to rely on this. A cache built in a lightweight 8-bit format and then reused directly for a final master will carry that format's limitations straight into your delivered file. This is the same reasoning behind the format table above, applied at the export stage instead of the editing stage.
If you change anything about a clip after it's cached, a grade, a keyframe, an effect setting, the cache for that section invalidates and Resolve rebuilds it the next time it's needed. Cache early in your process and the benefit compounds through the rest of the session. Cache right before export with nothing left to change, and Use Render Cached Images turns your final render into a fast file copy instead of a full recompute.
Where do cache files live, and how much disk space do they use?
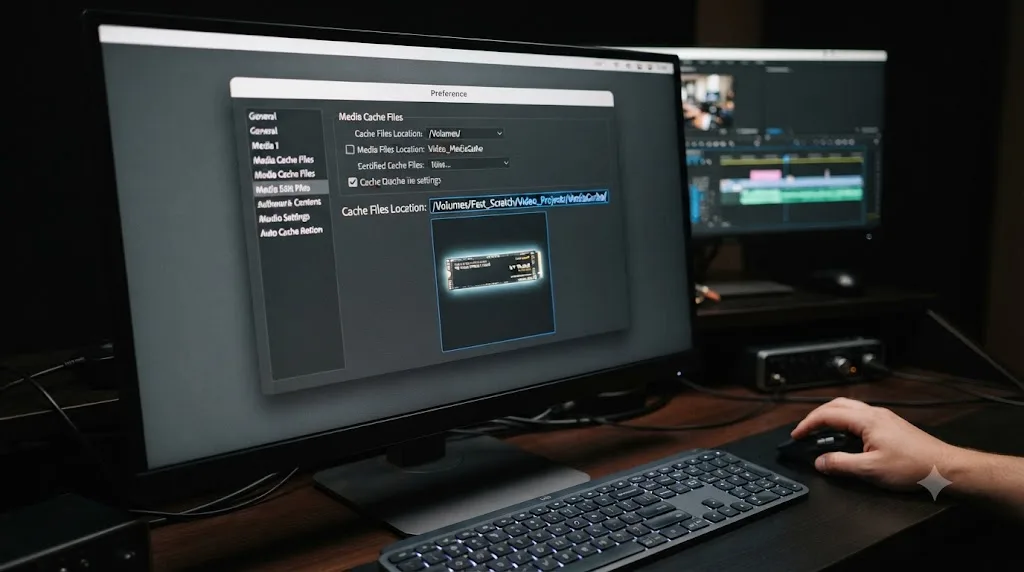
Wherever Project Settings tells them to. The Cache Files Location field sits in Master Settings, right next to the Render Cache Format dropdown, and every cached frame Resolve generates gets written there. Left at the default, that's usually a folder near your project files, which is fine on a fast internal drive and a real bottleneck on a slow one.
There's no fixed number for how much space to expect, because it scales with three things you control directly: the cache format you picked, the resolution you're caching at, and how much of the timeline gets flagged. A high-fidelity format like DNxHR 444 at full project resolution, cached across a long timeline with several heavy sections, can genuinely take up more disk space than the original camera files for the same footage. That's the price of the fidelity that format is built to preserve.
Two practical moves keep this from becoming a problem. First, point Cache Files Location at your fastest available drive, an internal SSD or NVMe, not a spinning external or a network share, since Resolve reads cached frames back from that disk during playback and a slow drive turns a fast cache into a new bottleneck. Second, don't cache more than you need: Smart mode with every checkbox enabled will cache things a fast machine never needed caching in the first place, which is exactly the scenario User mode exists to avoid. Our GPU memory guide covers the related VRAM side of heavy effects if disk space isn't your only concern on a demanding timeline.
How do you clear render cache without breaking your project?
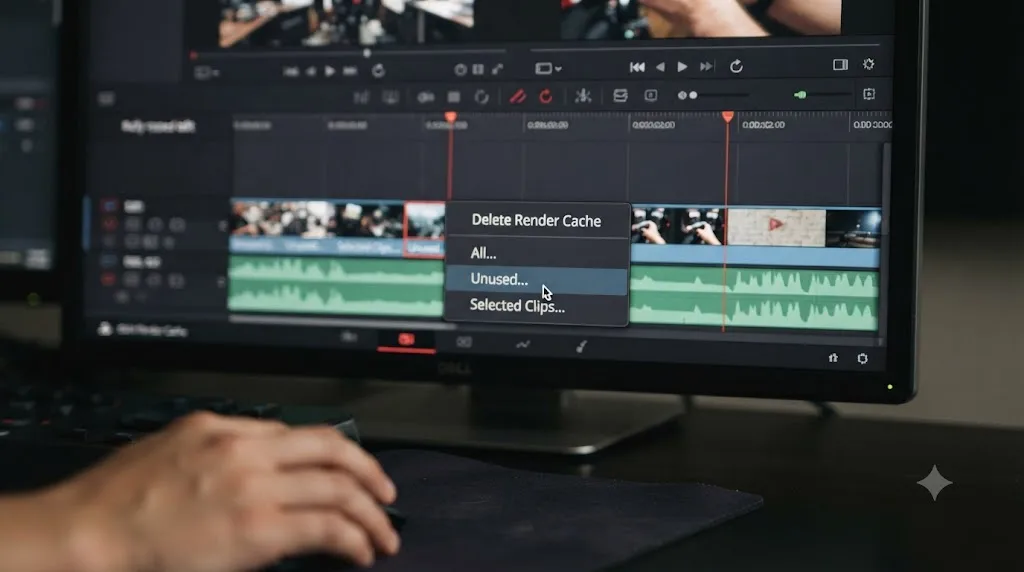
Through Playback, then Delete Render Cache, which gives you three options rather than one blunt wipe. Per the manual's section on clearing cached media, All deletes every cached clip and resets the project's cache entirely. Unused deletes "only Unused cache clips that no longer correspond to clips or effects in the Timeline," which is the safer everyday choice since it doesn't touch anything you're still actively using. Selected Clips deletes the cache only for whatever you've highlighted in the Timeline, useful when one specific section needs a rebuild and the rest is fine as it is.
A render cache file only works inside the project that built it, so it disappears the moment you switch timelines or open the project somewhere else. That's worth repeating because it surprises editors who expect cache to behave like Proxy Media. It doesn't travel with the project file, it doesn't survive a move to another machine, and switching timelines within the same project leaves the new timeline uncached even though the old one still has its files sitting on disk.
That last part matters for cleanup. Cache from finished projects is a classic hidden disk hog, sitting in a cache folder long after the edit shipped, quietly consuming space nobody remembers allocating. Delete All once a project is locked and delivered, or check Playback, then Delete Render Cache, then Manage Cache Data, which opens a Cache Manager tied to your Project Manager and lets you clear cache across every project library on the system, not just the one currently open.
Render Cache vs Optimized Media vs Proxy Media: which do you actually need?
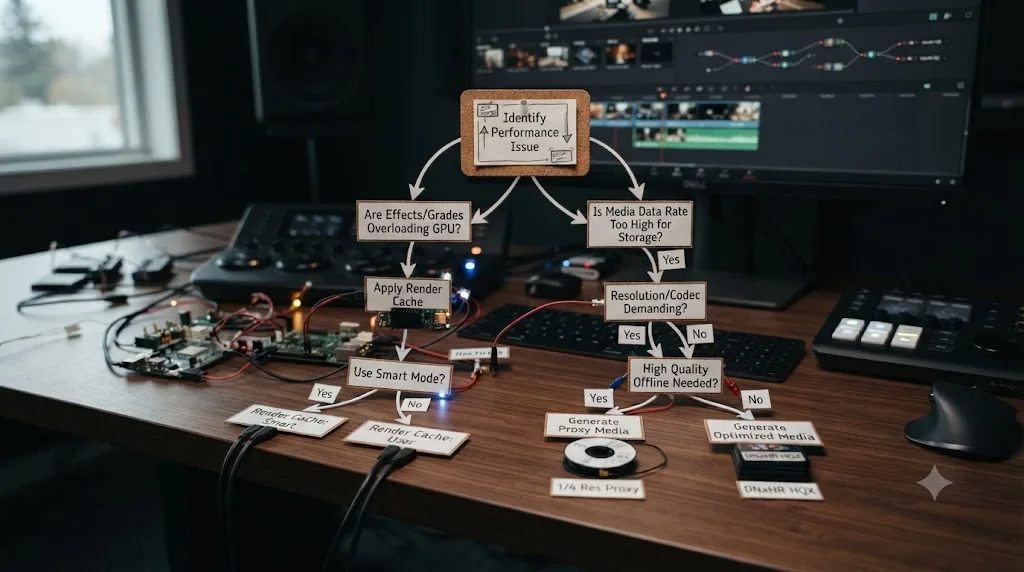
They solve different problems, and generating all three for every project wastes time and disk space you didn't need to spend. The fastest way to tell them apart is to ask what's actually slow: the source footage itself, or what you built on top of it.
Render Cache and Optimized Media solve two different problems: one caches what you added, the other replaces what you shot. If a plain, ungraded clip stutters on its own, no amount of render cache will help, because there's no effect to pre-render. That's an Optimized Media or Proxy Media problem, covered in full in the playback stuttering guide. If the same clip plays fine until you add a grade, a Fusion comp, or noise reduction, render cache is the right tool, because the cost lives entirely in the effect, not the source.
| Your situation | Use this | Why |
|---|---|---|
| Plain camera footage stutters, even without effects | Optimized Media or Proxy Media | The decode itself is the cost, and cache can't fix a decode problem |
| Footage plays fine, but grading or Fusion sections stutter | Render Cache | The effects are the cost, and caching their output removes it |
| Both are true at once | Optimized Media first, then Render Cache on remaining slow sections | Fix decode before compute, or you'll cache more than you need |
| Shared project, cross-platform team | Proxy Media, plus Render Cache locally per editor | Proxies travel with the project, render cache doesn't and shouldn't need to |
Most real timelines eventually use both, because most real footage is both hard to decode and gets graded. The order matters more than people expect: fix the decoding bottleneck first, since a clip that struggles to decode will still struggle even with a perfect cache sitting on top of a heavy grade you haven't built yet.
Does Fusion use the same render cache?
Partly, and the overlap trips people up. The Edit and Color page Render Cache described throughout this guide is a separate mechanism from Fusion's own internal caching, even though both use the word "cache" and both live under the same Playback menu umbrella. Right-click a clip with a Fusion effect on the Edit page and choose Render Cache Fusion Output, and Resolve pre-renders that clip's composite the same way it would cache a heavy color grade. Inside the Fusion page itself, though, right-clicking the MediaOut node and choosing Cache to Disk is a different, Fusion-specific cache that behaves more like the disk cache a standalone compositing app would use.
Our Fusion render slow guide goes deep on the Fusion-specific side of this: why Timeline Proxy Mode never touches Fusion's render cost, why swapping MediaIn nodes for Loader nodes on still images fixes more slowdowns than almost anything else, and how the Saver-and-Loader technique bakes a finished static section into a single cached image instead of letting Fusion recompute it every frame. If your stutter is specifically inside a Fusion comp rather than on the Edit or Color page, that guide picks up where this one leaves off.
What does a real caching decision look like on a project?
Take a common case: a 20-minute documentary timeline, cut from clean ProRes footage that already plays smoothly, with three sections carrying a heavy secondary grade and one section built around a Fusion title sequence.
The plain interview footage plays fine on its own, so Optimized Media or Proxy Media would be wasted effort here. There's no decode problem to solve. The three graded sections are where playback actually drops frames, and the Fusion title crawls specifically on the Edit page, both classic render cache symptoms.
Smart mode would catch the Fusion clip automatically, since Fusion compositions are on its default caching list, but it wouldn't necessarily catch the graded sections unless they're using Motion Blur, Noise Reduction, or a Resolve FX plugin specifically. A secondary grade built purely from Color Wheels and Curves nodes, however heavy visually, doesn't trip Smart mode's automatic triggers on its own.
That's exactly the case for User mode instead, or for Smart mode plus a manual On flag on those specific nodes. Right-click each heavy grading node and set its cache to On, so it's covered regardless of what Smart mode would have decided on its own. Set the Render Cache Format to DNxHR HQX or ProRes 422 HQ, since this is a documentary grade that benefits from 10-bit headroom without needing the full weight of DNxHR 444. Point Cache Files Location at the fastest internal drive on the system, not the external RAID holding the source footage.
The end state: three graded sections and one Fusion title play back at full speed, generated once during a coffee break rather than recomputed every time the playhead crosses them, and the plain interview footage, never touched by any of it, plays exactly as it did before anyone opened Project Settings.
Has render cache changed much across DaVinci Resolve's history?
Not structurally, and that's worth knowing before you assume this is a new-in-21 feature. Render cache in its current form, with Smart and User modes and a dedicated Project Settings panel, dates back to a major overhaul in Resolve 11. Patrick Inhofer, writing for the colorist training site Mixing Light at the time, described the update this way: "A great many factors play into when precisely you'll see those Red bars... this Insight will teach you what you can do to force Resolve into smooth Green bar playback" using what he called "the completely overhauled Render Cache function in Resolve 11."
That framing, red bars meaning trouble and green (now blue) bars meaning smooth playback, is the same mental model that applies to Resolve 21 today. What's changed since then is mostly around it: more cache-eligible formats as camera codecs evolved, tighter integration with Fusion Effects caching, and the background caching option that starts filling Smart cache after a few idle seconds without you asking. The core mechanism, Smart deciding automatically and User deciding manually, has held steady for a decade of releases.
Which mode should you actually use?
If you're not sure, start with Smart. It costs you nothing to try, it's reversible in one dropdown, and it catches the formats and effects that cause the most common stutters without asking you to know which ones those are in advance. Switch to User only once you've noticed Smart mode caching things you didn't need, usually visible as disk space disappearing faster than your actual editing pace justifies, or once you're confident enough in your own machine's headroom to want tighter control.
Either way, the format and location settings matter more than the mode toggle itself. A Smart cache written in the wrong format can clip your highlights just as easily as a User cache can, and both are useless if Cache Files Location points at a drive too slow to read them back. Get those two settings right first, then treat Smart versus User as the smaller decision it actually is.
If working through Project Settings for the first time feels like guesswork, that's the specific gap TryUncle is built for. It watches your actual Resolve window and points at the control you're asking about, instead of sending you to a manual page to figure out which dropdown does what.
Render cache isn't a mystery once you separate it from decoding. It's a targeted fix for one specific cost: the effects and grading you built on top of your footage, saved once so Resolve stops rebuilding them on every frame you scrub past.
Frequently asked questions
- What does DaVinci Resolve's render cache actually do?
- It pre-renders processor-intensive clips, effects, and grades into a temporary file that Resolve plays back instead of recalculating the original in real time. It doesn't touch decode speed or your camera codec. It only removes the cost of what you added on top, like grades, noise reduction, and Fusion compositions.
- Should I use Smart Cache or User Cache in DaVinci Resolve?
- Use Smart Cache if you want Resolve to manage caching automatically and don't mind background disk use. Use User Cache if you're on a fast machine that already plays most things in real time, and you only want to cache the specific clips or nodes that actually stutter.
- Does render cache lower my export quality?
- Not if you pick a cache format that matches or exceeds your delivery target. Set the Render Cache Format to a 10-bit or higher option like DNxHR HQX or ProRes 4444 for grading work, and quality carries through cleanly. An 8-bit cache format can visibly clip highlights or shadows your grade depends on.
- Why did my render cache disappear when I switched timelines?
- Because render cache is tied to the specific timeline and project it was built for. It isn't portable between timelines, projects, or machines the way Proxy Media is. Switch timelines and Resolve treats the new one as uncached until you build its cache separately.
- How much disk space does DaVinci Resolve's render cache use?
- It depends on your cache format, resolution, and how much of the timeline gets flagged for caching. A higher-quality format like DNxHR 444 at full resolution can use more disk space than your original camera files for the same clip, so point the cache at a drive with real headroom and clear it once a project ships.
- Is render cache the same as Optimized Media or Proxy Media?
- No. Optimized Media and Proxy Media replace your original camera files with an easier-to-decode stand-in. Render cache leaves your source files alone and instead pre-renders the effects and grading you added on top of them. Most real projects end up using both, for different problems.
- Does DaVinci Resolve Free include render cache?
- Yes. Render Cache, Smart mode, User mode, and per-clip cache flags are identical in the free version and Studio. What differs between editions is decode performance on Windows and Linux, which changes how much a project needs caching in the first place, not the cache feature itself.
Sources
- DaVinci Resolve Reference Manual: The Difference Between Smart Cache and User Cache Modes (VFXPedia mirror)
- DaVinci Resolve Reference Manual: Using the Smart or User Cache Improves Effects Performance (VFXPedia mirror)
- DaVinci Resolve Reference Manual: Manually Controlling the Cache (VFXPedia mirror)
- DaVinci Resolve Reference Manual: Controlling Fusion Output Caching (VFXPedia mirror)
- DaVinci Resolve Reference Manual: Clearing Cached Media (VFXPedia mirror)
- DaVinci Resolve Reference Manual: Using Cached Media When Rendering in the Deliver Page (VFXPedia mirror)
- Render Cache: Full Frame Rate Playback Guaranteed in DaVinci Resolve 11, Part 1, by Patrick Inhofer (Mixing Light)
- How to Render Cache in DaVinci Resolve? (TourBox)
- DaVinci Resolve - Tech Specs (Blackmagic Design)
Learn by doing, not watching
Learn Resolve inside Resolve.
TryUncle watches your screen and points at the exact control when you ask. No tabs, no timestamps, no rewatching tutorials.
Download for MacKeep reading
Fixes · Jul 7, 2026 · 25 min
DaVinci Resolve Playback Choppy or Stuttering? The Real Fix
Fix choppy DaVinci Resolve playback with Optimized Media, Proxy Media, Render Cache, Timeline Proxy Mode, and the Resolve 21.0.2 NVIDIA decode fix.
Fixes · Jul 10, 2026 · 26 min
DaVinci Resolve Fusion Render Slow? The Real Fixes
Why DaVinci Resolve's Fusion page renders so slowly, and the real fixes: resolution passthrough, MediaIn vs Loader, node caching, and CPU-only nodes.
Fixes · Jul 7, 2026 · 25 min
DaVinci Resolve GPU Memory Is Full: Every Real Fix
Why DaVinci Resolve throws 'GPU memory is full,' and which fixes actually work: timeline resolution, drivers, effects, and how much VRAM you need.