Articles / Guidesupdated for DaVinci Resolve 21.0.2 (July 2026)
DaVinci Resolve Noise Reduction Settings: Temporal and Spatial
Quick answer
DaVinci Resolve's Noise Reduction panel (Studio only) has two tools: Temporal NR averages 1-5 neighboring frames to remove noise without softening detail, and Spatial NR smooths within a single frame. Start with Temporal frames around 2-3, Luma threshold near 30-40, Motion Range matched to your footage's movement, then add light Spatial NR only if grain remains.
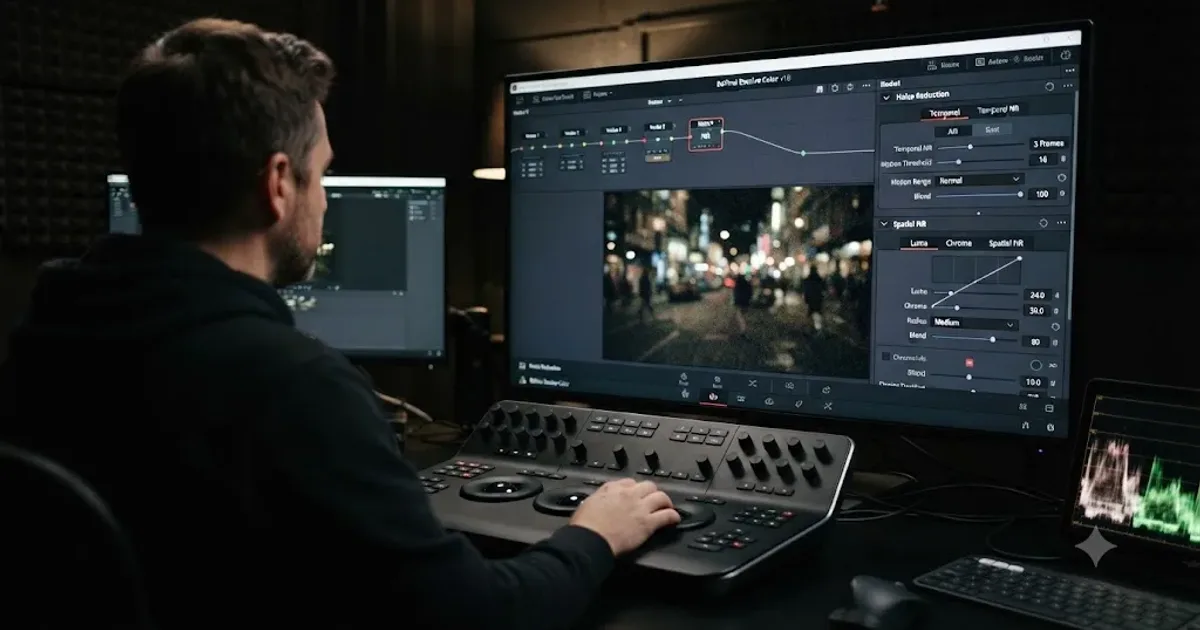
Noise reduction in DaVinci Resolve isn't one slider. It's two separate tools, Temporal and Spatial, each with its own frame count, threshold, and motion range, and the wrong combination either leaves your grain untouched or turns skin into wax. I'll give you the actual control names and their real value ranges straight from Blackmagic's own manual, plus the order to dial them in so you're not guessing shot by shot.
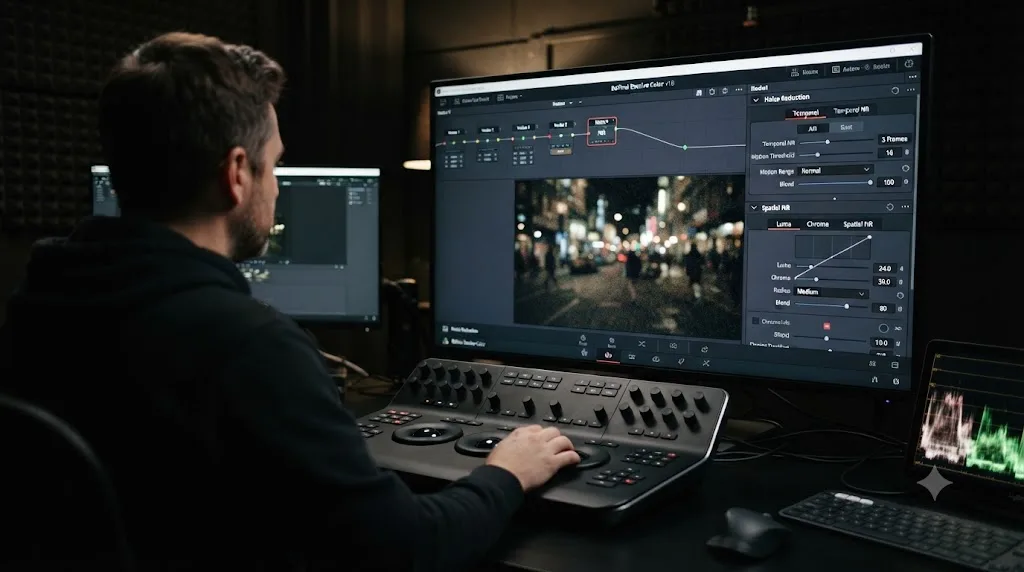
Where do you find Noise Reduction in DaVinci Resolve?
On the Color page, in the row of tool icons above the color wheels, alongside Qualifier, Curves, and the Window palette. Park your playhead on the clip you want to clean up, click the Noise Reduction icon, and you'll see two tabs: Temporal and Spatial. Each has its own enable checkbox, so you can run one, the other, or both stacked together.
One thing trips people up immediately: if you're on the free version, this panel doesn't exist. Not grayed out, not limited, just absent. Noise reduction, along with the newer AI-based UltraNR, lives entirely behind the DaVinci Neural Engine, which Blackmagic reserves for DaVinci Resolve Studio. We'll cover exactly what that means for your workflow further down.
Give noise reduction its own node. Don't stack it into the same node as your exposure correction or your creative look. If our color grading basics guide taught you anything, it's that one task per node is what makes a grade easy to undo, and noise reduction is one of the most GPU-expensive tasks you'll add to any chain, which makes isolating it doubly worth doing.
Should you use Temporal or Spatial noise reduction first?
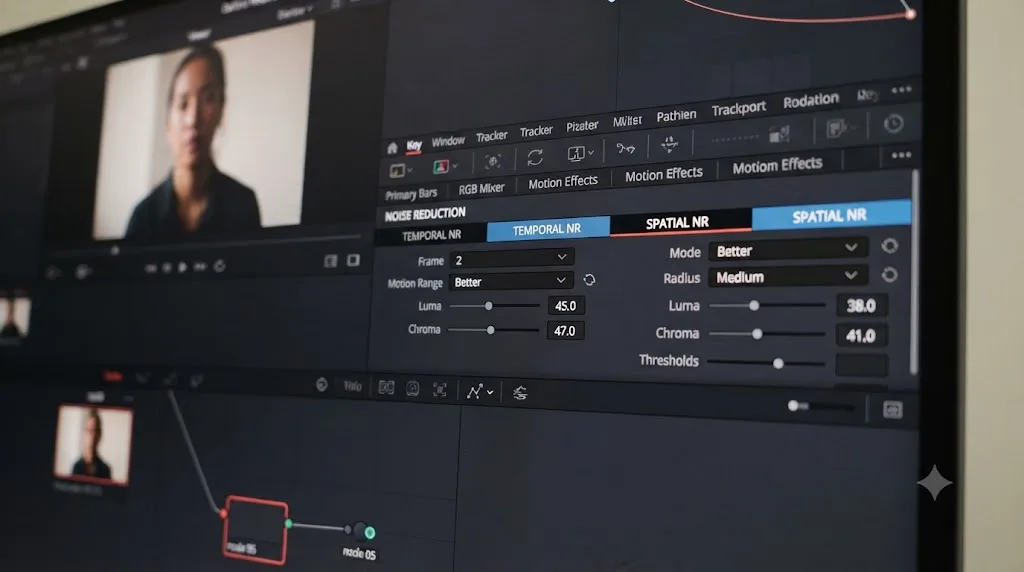
Temporal, almost always. Temporal Noise Reduction analyzes motion across neighboring frames, while Spatial Noise Reduction only ever looks at the single frame you're viewing. That distinction is the whole reason Temporal comes first: comparing several frames of the same static detail lets Resolve separate real texture from random noise far more precisely than blurring one frame in isolation ever can.
Boris FX describes the same logic in its own Continuum noise reduction tool, which offers a "Temporal-Spatial" smoothing mode that runs in a specific sequence: "The incoming image is smoothed temporally, and the temporally smoothed image is then smoothed spatially." That's not a Resolve-specific claim, but it's the same architecture Resolve's own two-tab panel implies: temporal first, spatial as the cleanup pass for whatever the temporal analysis couldn't resolve.
The practical version of this workflow: enable Temporal NR, dial it until most of the grain is gone, then judge what's left before touching Spatial at all. Skipping straight to Spatial because it looks simpler (one tab, no motion settings to think about) usually means over-blurring the image to compensate for a job Temporal would have done more cleanly.
What do the Temporal Noise Reduction settings actually do?
Six controls, and every one of them is documented in Blackmagic's own DaVinci Resolve reference manual. Here's what each one means before you touch it:
| Control | Range | What it does |
|---|---|---|
| Number of Frames | 0-5 | How many neighboring frames Resolve averages to separate detail from noise. 0 disables frame averaging entirely. |
| Motion Est. Type | None, Faster, Better | Whether and how Resolve tracks motion between the frames it's averaging. Faster is cheaper and less accurate; Better is more accurate and more GPU-intensive. |
| Motion Range | Small, Medium, Large | The speed of motion Resolve should expect to exclude from the averaging, so real movement doesn't get treated as noise. |
| Luma Threshold | 0-100 | How aggressively Temporal NR is applied to luminance (brightness) noise. 0 applies none, 100 applies the maximum. |
| Chroma Threshold | 0-100 | The same scale, applied to color noise instead of brightness noise. Linked to Luma by default, but can be decoupled. |
| Motion Threshold | 0-100 | How much of the frame Temporal NR touches at all, based on how much motion Resolve detects. 0 applies it to no pixels, 100 to all pixels, and the default is 50. |
Read that table as a pipeline, not a list of independent sliders. Number of Frames sets how much history Resolve has to work with. Motion Est. Type and Motion Range decide how carefully it tracks movement within that history. The three threshold sliders then decide how strongly the result actually gets applied, separately for brightness, color, and motion-affected regions.
What Number of Frames setting should you actually start with?
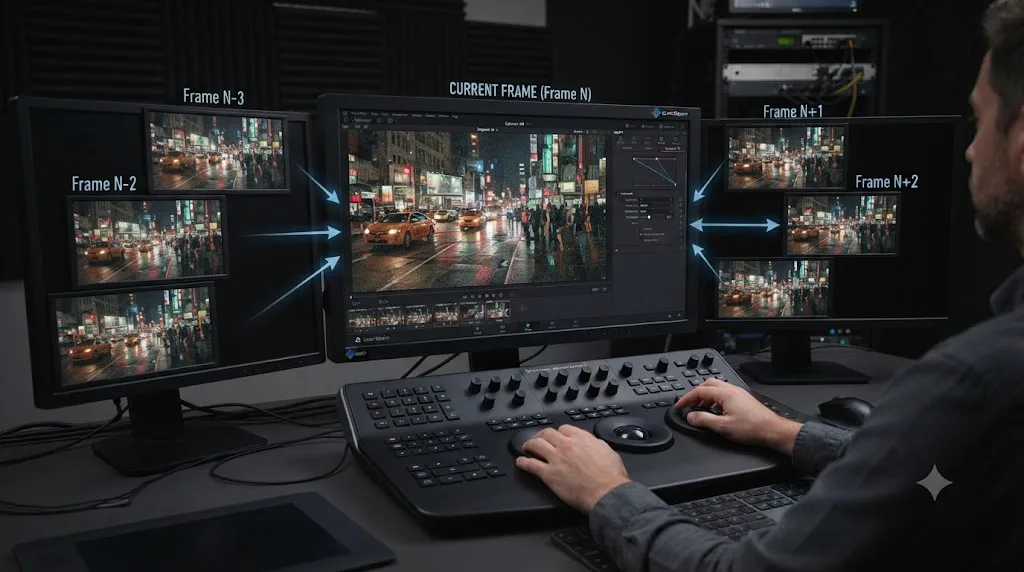
Two or three, for most footage, then adjust based on what you see in motion. The Number of Frames control runs from 0 to 5 per the manual, and the instinct to max it out for "more noise reduction" backfires the moment anything in the shot moves.
Here's why. Every additional frame Resolve averages is another moment in time getting blended into the current one. On a locked-off shot of a static object, that's free quality: five frames of the same unmoving detail average out to a cleaner result than two frames would. On a handheld interview or anything with motion, those extra frames are slightly different pictures, and no amount of motion estimation is perfect. Push Number of Frames too high on moving footage and you get faint trailing behind moving edges, most visible on hair, hands, and fabric folds.
A Temporal NR setting tuned for a locked-off interview will smear a handheld shot into a ghostly blur. That's the single most common mistake in noise reduction settings: copying a value that worked on one clip onto a whole timeline of mixed shots. PremiumBeat's Lewis McGregor makes exactly this point in his walkthrough of Resolve's noise reduction tools: there's no universal go-to setting, and he adjusts per shot, in one case pushing a Spatial threshold as high as 40 on a particularly noisy clip specifically because that shot needed it, not because it's a standard value.
A practical starting range by shot type:
| Shot type | Number of Frames starting point | Why |
|---|---|---|
| Locked-off tripod, static subject | 3-5 | Nothing moves except the noise itself, so more history is pure gain |
| Handheld interview, moderate movement | 2 | Enough averaging to help, low enough to keep motion estimation reliable |
| Fast handheld, run-and-gun, action | 1 | Motion estimation struggles at this speed regardless of setting, so keep the averaging light |
| Drone or gimbal, smooth continuous motion | 2 | Motion is predictable and smooth, which motion estimation tracks well even at a moderate frame count |
Watch a moving edge at 100 percent zoom whenever you raise this value. If you see a faint double-exposure trail behind it, you've gone one frame too far for that shot's motion.
What does Motion Estimation Type and Range control, and which should you pick?
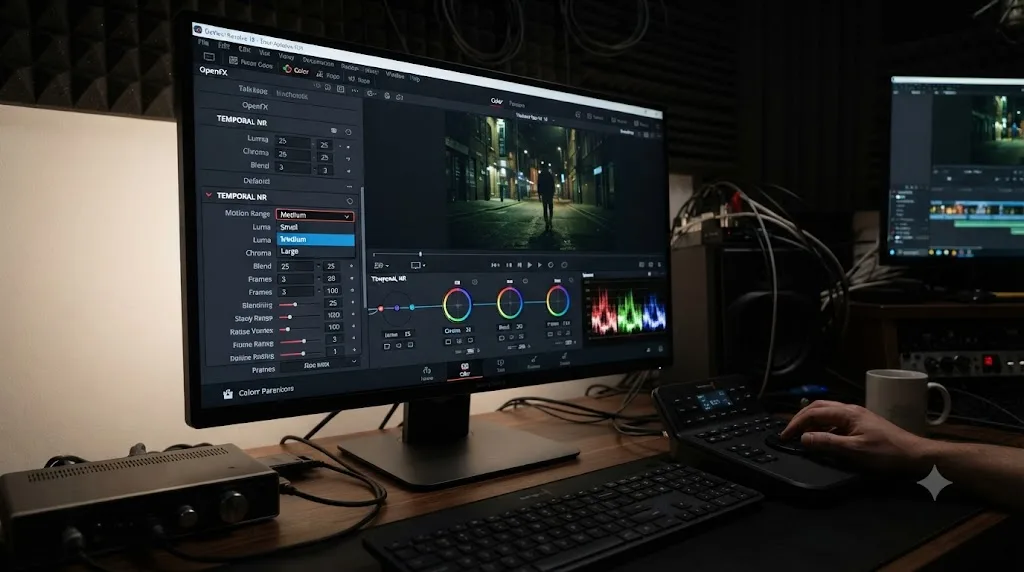
Motion Est. Type decides how hard Resolve works to track movement before it decides what to average. Per the manual, Faster is "less processor intensive, but less accurate," while Better "can effectively exclude motion more accurately" at a higher GPU cost. A third option, None, skips motion estimation entirely, which only makes sense on genuinely static footage where there's nothing to track in the first place.
Motion Range works alongside that setting, telling Resolve what speed of movement to expect: Small assumes slow-moving subjects, Large assumes fast motion with visible blur. Setting Motion Range too small for a fast pan or a running subject means Resolve's motion estimation gets overwhelmed and starts averaging frames that don't actually match, which is exactly what produces ghosting.
| Footage | Motion Est. Type | Motion Range |
|---|---|---|
| Static interview, tripod | Faster or None | Small |
| Walking subject, slow pan | Better | Small to Medium |
| Handheld, moderate camera movement | Better | Medium |
| Fast pans, sports, action, running subjects | Better | Large |
| Drone footage, smooth gimbal moves | Better | Medium to Large |
The tradeoff is real GPU time, not a placebo setting. Better motion estimation asks the GPU to do genuine per-pixel motion analysis across every frame in the averaging window, on top of the noise reduction math itself. On a card that's already close to its VRAM ceiling, that's often the setting that tips a timeline into stuttering, which our GPU memory guide covers in more depth if you're already fighting that error.
What do the Luma and Chroma Threshold sliders actually change?
They're the volume knobs for everything the frame-averaging and motion estimation already calculated. Per the manual, both Luma and Chroma Threshold run 0 to 100, where 0 applies no noise reduction at all and 100 applies the maximum amount, and the two are linked together by default so a change to one moves the other, until you decouple them.
Decoupling matters because luma noise and chroma noise don't behave the same way. Luma noise, the grainy brightness variation you see most clearly in shadows, tends to be finer-grained. Chroma noise, the blotchy color speckling that shows up worse in underexposed footage and on smaller camera sensors, is coarser and often more visually distracting per unit of intensity. That's why a lot of colorists run Chroma Threshold noticeably higher than Luma: color noise is uglier at a lower intensity, so it needs a stronger push to clean up, while pushing Luma too hard starts eating fine detail (skin texture, fabric weave, background foliage) faster than Chroma does.
There's also a Motion Threshold slider, separate from Luma and Chroma, that controls how much of the frame Temporal NR touches based on detected motion, again on a 0 to 100 scale, defaulting to 50. At 0, Temporal NR applies to no pixels regardless of your other settings. At 100, it applies everywhere. The default of 50 is a reasonable middle ground for most shots, but a shot with one small moving subject against a static background can sometimes benefit from lowering it, so noise reduction concentrates on the still parts of the frame where motion estimation is most reliable.
What do the Spatial Noise Reduction settings do?
Spatial NR works entirely within a single frame, no history, no motion estimation, which makes it cheaper on the GPU but more prone to visible softening if you push it. Per the manual, it has three algorithm choices under Mode: Faster, a lightweight option; Better, higher quality at a higher cost; and Enhanced, which the manual describes as preserving detail better than the other two, particularly at higher threshold values. Radius comes in Small, Medium, and Large, trading quality for real-time performance depending on how strong your threshold setting is. And Luma and Chroma Threshold work exactly as they do on the Temporal tab, 0 to 100, linkable or independent.
| Control | Options | What to know |
|---|---|---|
| Mode | Faster, Better, Enhanced | Enhanced holds detail best at higher thresholds, but costs the most GPU time |
| Radius | Small, Medium, Large | Larger radius smooths a wider area per pixel, at a real cost to fine detail |
| Luma Threshold | 0-100 | Push gently. Spatial NR has no motion data to fall back on, so aggressive values blur real texture along with noise |
| Chroma Threshold | 0-100 | Usually tolerates a higher value than Luma before detail loss becomes visible, same logic as the Temporal tab |
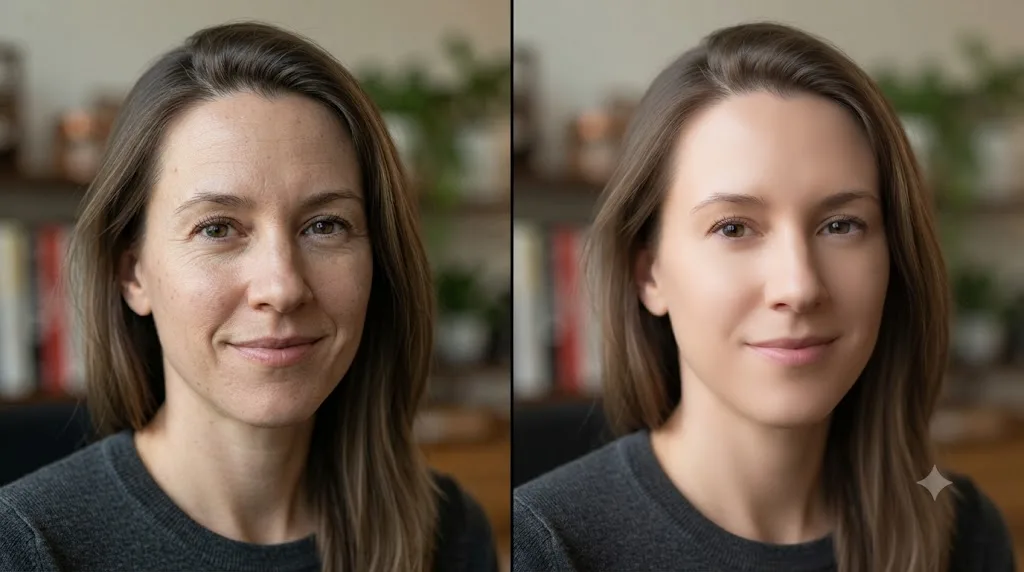
The waxy, plastic look people blame on "over-processed color" is almost always an over-tightened noise reduction threshold, not the grade. Spatial NR is the more common culprit, because it's blurring within a single frame with no motion context to protect real edges. If a shot suddenly looks like a video game cutscene, skin smoothed into a uniform sheen, dial Spatial Threshold back before you touch anything else in the node chain.
When should you add Spatial NR on top of Temporal?
When grain is still visible after Temporal NR has done what it can, not as a default second step. A well-tuned Temporal pass handles most sensor noise on its own. Spatial NR earns its place in three specific situations: leftover chroma noise that survives Temporal's motion-based cleanup, footage where motion estimation genuinely can't help (heavy compression artifacts, digitized film scans with no true frame-to-frame consistency), or a single stubborn shot where a light Spatial pass finishes the job faster than chasing higher Temporal thresholds that start to ghost.
Keep the Spatial threshold restrained when you do add it. A Luma Threshold in the range of 10 to 20 alongside a solid Temporal pass usually cleans up what's left without visibly softening the image. Reach for 30 or 40, the kind of value McGregor described using on a specifically bad shot, only when the grain is bad enough that a lighter touch genuinely isn't enough, and expect to trade some fine detail for it.
Does noise reduction go before or after your grade?
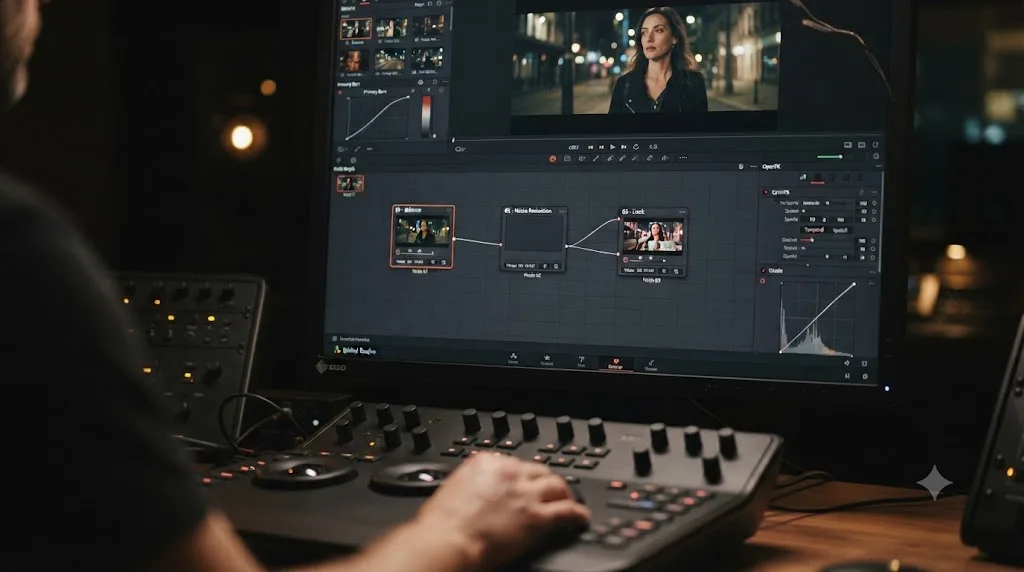
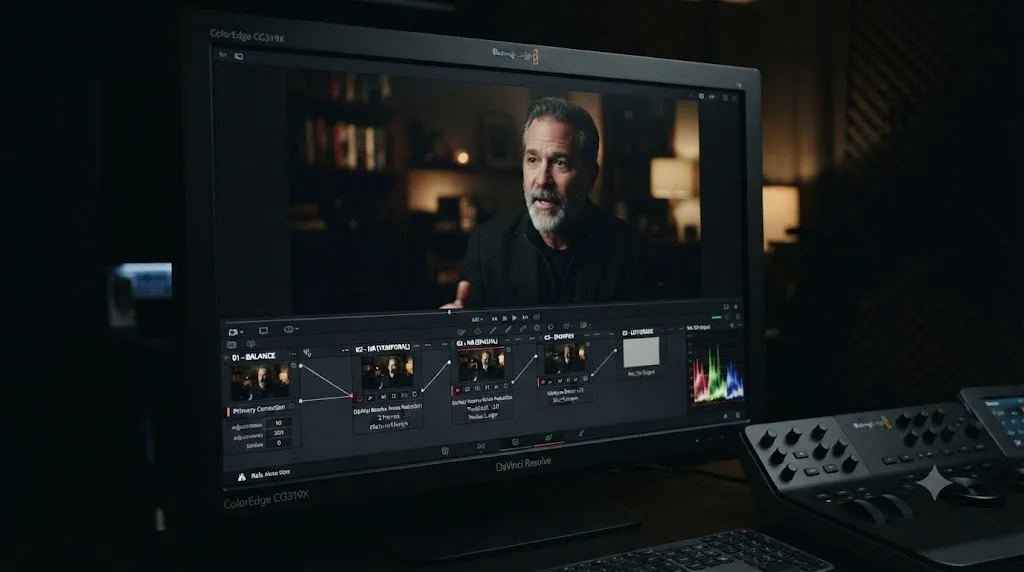
Before the creative look, after the basic correction. Give noise reduction its own node, placed right after you've set exposure, white balance, and basic contrast, but before any secondary color work, power windows, or the final stylistic look.
The reasoning is the same one that governs the rest of a node chain: each step should work on an image that's already close to its final tonal shape, without the ordering confusing what happens later. A badly underexposed shot lifted heavily in Gamma reveals shadow noise that wasn't obviously visible before the lift, so correcting exposure first tells you how much noise reduction you actually need, rather than guessing against a still-too-dark image. And applying noise reduction before a creative look, rather than after, means saturation and contrast pushes in the final grade aren't amplifying grain that a downstream noise reduction pass hasn't touched yet.
If you're grading log footage, this raises a specific question covered in the section below: does noise reduction happen before or after the Color Space Transform that normalizes the image? The short answer is it depends on the noise, and it's worth its own explanation rather than a blanket rule.
Should you denoise log footage before or after normalizing the color space?
There's a genuine tradeoff here, not a single correct answer. Log footage, S-Log3, Canon Log, ARRI LogC, compresses the camera's dynamic range into a flat, low-contrast file, and how you handle noise reduction relative to that compression curve changes what the noise reduction algorithm actually sees.
Denoise before the Color Space Transform (in log space) and Temporal and Spatial NR are working on the noise as the sensor actually recorded it, before any tone mapping stretches or compresses parts of the range. This matches the approach our color grading basics guide recommends for balance corrections generally: work upstream of the CST node so your adjustments respond the way they would have on set. The downside is that log footage looks flat and low-contrast on the scopes, which makes it genuinely harder to judge how much noise reduction is enough, since everything looks slightly murky before normalization.
Denoise after the Color Space Transform (in Rec.709 or your working color space) and you're judging the noise reduction against an image that actually looks like the final shot, which makes threshold decisions more intuitive. The tradeoff: the CST's tone mapping has already stretched the shadows where noise concentrates, which can make grain look worse than it did in log, and any noise reduction here has to work a little harder to compensate for contrast the transform just added.
In practice, if you're new to this decision, denoise after normalization. You'll see the real result you're judging against, and the threshold values will make more visual sense the first several times you dial them in. Move noise reduction upstream of the CST once you're comfortable judging noise in flat log footage and want to catch it before any tone mapping touches it.
Why does temporal noise reduction cause motion blur or ghosting?
Because motion estimation is a best guess, not a perfect track. Temporal NR works by finding the same piece of detail across several frames and averaging it, and Motion Est. Type and Motion Range exist specifically to help it find the right matching pixels despite movement. When the estimation gets it wrong, wrong meaning it averages pixels from a frame where that detail was actually somewhere else, the result is a faint trailing copy of the moving edge, visible as ghosting or smearing behind hands, hair, or anything with a soft, low-contrast edge against its background.
Three settings make this worse, and knowing which one is the culprit saves you from guessing:
| Symptom | Likely cause | Fix |
|---|---|---|
| Trailing behind fast-moving edges | Number of Frames too high for the motion in the shot | Lower Number of Frames, or raise Motion Range to match the real speed |
| Ghosting concentrated on hair and fine detail | Motion Est. Type set to Faster on a shot with real movement | Switch to Better, which tracks motion more precisely at a higher GPU cost |
| Smearing across the whole frame, even mostly-static shots | Motion Range set too small for the actual camera or subject movement | Raise Motion Range one step, from Small to Medium or Medium to Large |
The fastest way to catch this before it ships: bypass every other node with Ctrl+D (Windows) or Cmd+D (Mac), zoom the viewer to 100 percent, and scrub slowly through the fastest motion in the shot. Ghosting that's invisible at a glance in the timeline viewer is often obvious at full resolution on a single frame.
How much GPU memory and render time does noise reduction actually cost?
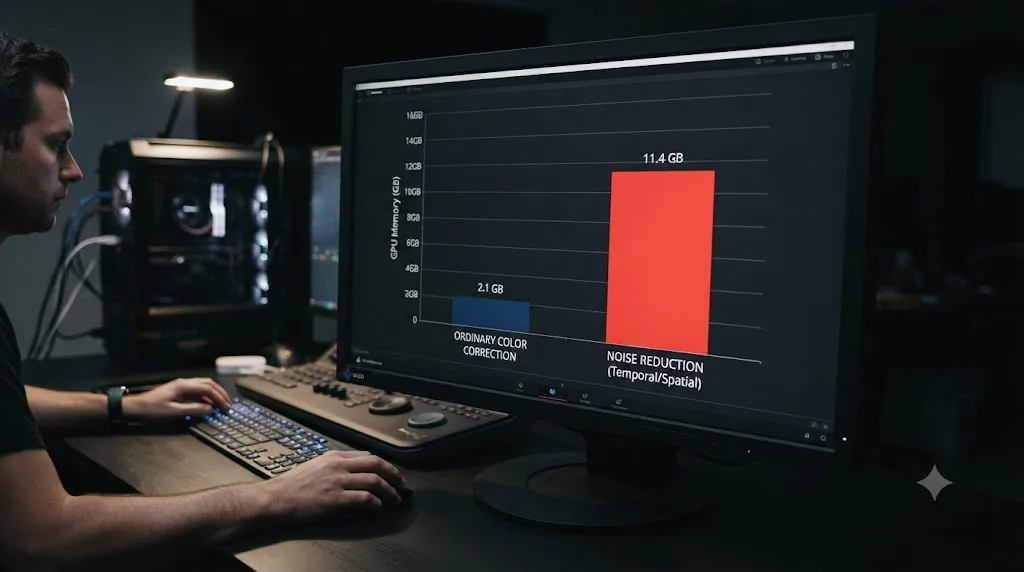
More than nearly anything else you'll add to a grade. Temporal NR has to hold multiple full frames in GPU memory simultaneously to compare them, which multiplies your VRAM cost by roughly however many frames you've set in the Number of Frames control, on top of the frame Resolve is already holding for playback and display.
Our GPU memory guide breaks down the arithmetic in detail, but the short version: a single UHD frame held at high precision runs to roughly 130MB, and a Temporal NR window comparing several neighboring frames holds each of those as another working copy before the noise reduction math even runs. That's exactly why an 8GB card can handle a clean 4K timeline and a moderate grade, then throw a "GPU memory is full" error the instant Temporal NR lands on a clip.
Puget Systems' own hardware recommendations for DaVinci Resolve note plainly that Resolve "heavily relies on the performance of your GPU (especially when using OpenFX or noise reduction)," and their GPU scaling analysis of DaVinci Resolve Studio 18.6 found that Temporal Noise Reduction "show[s] less of a benefit" from adding a second GPU than other effects like Sharpen do, meaning it doesn't scale as cleanly across multiple cards as some other GPU-bound tasks in Resolve.
Noise reduction spends GPU memory the same way any other node does, and temporal noise reduction spends more of it than nearly anything else in the node graph. Two practical consequences follow from that. First, if playback stutters the moment you enable Temporal NR, that's expected behavior, not a broken setup, and our slow playback guide covers caching strategies that apply directly here. Second, cache the node once your settings are final: right-click it and enable its individual node cache, or set your project's Render Cache to Smart, so Resolve computes the expensive analysis once and reuses the result instead of recalculating it on every scrub and every playback pass.
Do you need DaVinci Resolve Studio to use noise reduction?
Yes, for both of Resolve's built-in noise reduction tools. Blackmagic's own Studio product page lists what the paid license adds on top of the free version, including "the DaVinci Neural Engine, dozens of additional Resolve FX, temporal and AI spatial noise reduction, text-based editing, Magic Mask, film grain, optical blur, and more." Noise reduction sits explicitly on that list, alongside AI spatial noise reduction, which is the newer UltraNR tool covered in the next section.
Noise reduction is a DaVinci Resolve Studio feature. The free version doesn't show a Noise Reduction panel at all. That's a meaningfully different gate than something like Magic Mask, which at least shows a watermarked preview in the free version so you can judge whether it's worth paying for. Noise reduction is invisible until you have the license, which means the only way to evaluate it firsthand is on a trial or on footage you already own the Studio license to grade.
Our Studio pricing breakdown covers the full $295 decision if noise reduction is the deciding feature for you, but the short version specific to this topic: if you shoot in low light, at high ISO, on small sensors, or you edit footage other people captured under conditions you don't control, noise reduction is one of the handful of Studio features that tends to justify the one-time cost on its own, especially against a subscription-based competitor charging monthly for the same capability.
What is UltraNR, and how is it different from standard Spatial NR?
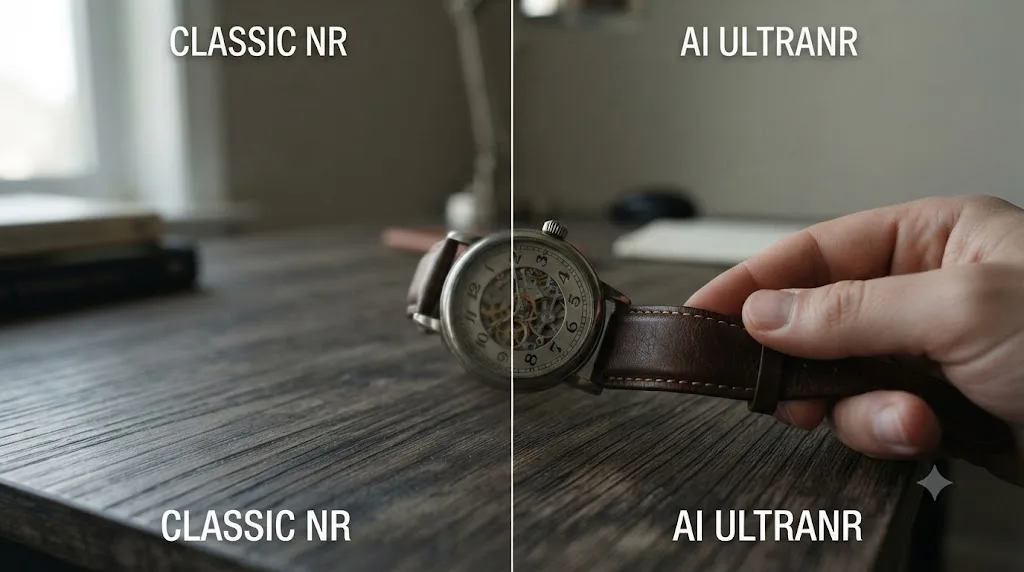
UltraNR is Blackmagic's newer, AI-driven alternative to the classic Spatial NR algorithm, and it runs on the DaVinci Neural Engine rather than a fixed mathematical formula. Heather Hay, a professional colorist writing for Frame.io Insider, described the distinction plainly in her rundown of Resolve 19's color tools:
"UltraNR for spatial denoising is an AI-based noise reduction option that uses machine learning of the video noise patterns instead of a mathematical formula."
The practical difference: a traditional Spatial NR algorithm applies the same blur logic uniformly based on your threshold and radius settings, regardless of what's actually in the frame. A model trained on noise patterns can, in principle, distinguish grain from genuine fine detail more intelligently, which tends to preserve texture better at an equivalent noise reduction strength. That's the same general tradeoff that shows up across most AI-assisted tools in Resolve, more capable of context-aware decisions, at the cost of being locked to the Studio tier and, like Temporal NR, demanding real GPU time to run its model alongside your grade.
One workflow tip from the same article, and it applies to noise reduction generally, not just UltraNR. Hay noted that she compensates for the softening any denoiser introduces: "As with most noise reduction tools, I add just a touch of sharpness at the end to balance any softening that may have occurred during the noise reduction process." A light Sharpen node placed after your noise reduction node, dialed conservatively, is a standard finishing step precisely because every noise reduction method, mathematical or AI-based, removes some real detail along with the grain.
How does camera ISO or gain affect how much noise reduction you need?
Directly and predictably: raising ISO or gain raises your noise floor, so a shot recorded at a high ISO always needs a stronger noise reduction setting than the same scene recorded at a camera's native ISO, all else equal.
Raising a camera's ISO or gain amplifies the sensor's noise floor right along with the image, so heavier grain always calls for a stronger noise reduction setting, not a fixed one. This isn't a Resolve-specific quirk. It's how gain works on every camera: the sensor's read noise gets amplified along with the signal whenever you push exposure electronically instead of optically. Blackmagic's own URSA Broadcast tech specs lay out the relationship in concrete numbers, running from -12dB (equivalent to 100 ISO) up to +36dB (equivalent to 25,600 ISO), with native sensitivities at ISO 400 and a secondary high base of ISO 3200 for dim environments. Every step up that dB scale trades a brighter image for more visible noise, which is exactly the tradeoff noise reduction exists to manage after the fact.
Cinema cameras document the same range at the higher end. ARRI's ALEXA 35 brochure lists an exposure index range from EI 160 to EI 6400, and colorists working with footage shot near the top of that range routinely plan for a stronger noise reduction pass than footage shot near base ISO, simply because more gain was applied at capture.
What that means for your settings, practically:
| Recording condition | Expected noise level | Starting point |
|---|---|---|
| Native or base ISO, well-lit scene | Low | Light Temporal NR (1-2 frames), Spatial usually unnecessary |
| One or two stops above base ISO | Moderate | Temporal NR at 2-3 frames, Luma threshold in the 20-30 range |
| Secondary high base ISO, dim interiors | Elevated | Temporal NR at 3 frames, higher Chroma threshold, light Spatial for cleanup |
| Maximum gain, near-dark or underexposed and lifted in post | Heavy | Temporal NR pushed harder, Spatial NR added, expect visible detail tradeoff |
The takeaway isn't a specific number to copy. It's that your noise reduction settings should scale with how the shot was captured, not stay fixed across a project. A wedding reception shot at ISO 6400 and a daylight interview shot at ISO 400 need genuinely different Temporal and Spatial values, even if they're cut into the same timeline.

Does noise reduction fix compression artifacts the same way it fixes sensor noise?
No, and expecting it to is a common source of disappointment. Sensor noise is essentially random variation introduced at capture, which is exactly the kind of signal Temporal and Spatial NR are built to separate from real detail. Compression artifacts, blocky macroblocking, banding in gradients, mosquito noise around hard edges, come from a codec discarding information to hit a target bitrate, and they're structured, not random. Noise reduction can soften some of that blockiness, but it's working against damage that already happened to the image, not noise that a statistical averaging process can cleanly reverse.
If your footage looks bad because of heavy H.264 or H.265 compression at a low bitrate, more aggressive noise reduction settings will blur the artifacts without truly removing them, and you'll trade detail for a marginal improvement. The better fix in that case is upstream of Resolve entirely: source higher-bitrate footage where possible, or accept that a badly compressed source has a ceiling no amount of Temporal or Spatial NR pushes past.
Should you apply noise reduction to a whole timeline or shot by shot?
Shot by shot, in almost every real project. Noise reduction settings depend on ISO, lighting, motion, and camera, all of which change between shots even within the same scene, which is exactly why McGregor's PremiumBeat approach of tuning per clip rather than reaching for a universal value holds up in practice.
That said, timeline-wide or group-level noise reduction has a place. If an entire project was shot under one consistent condition, a single camera at a fixed high ISO in a dim venue, applying one tuned noise reduction setting via a Group Pre-Clip node (the same grouping mechanic covered in our color grading basics guide) saves you from repeating the same dial-in on every clip. The rule of thumb: group noise reduction when the shots genuinely share the same noise character, and keep it per-clip the moment lighting, ISO, or camera changes between them.
Either way, cache aggressively. A noise reduction setting applied across a whole group or timeline multiplies its GPU cost across every clip that inherits it, which makes Render Cache's Smart mode, or manually caching the group's pre-clip node, the difference between a responsive timeline and one that stutters on every cut.
What noise reduction settings should you use for common scenarios?
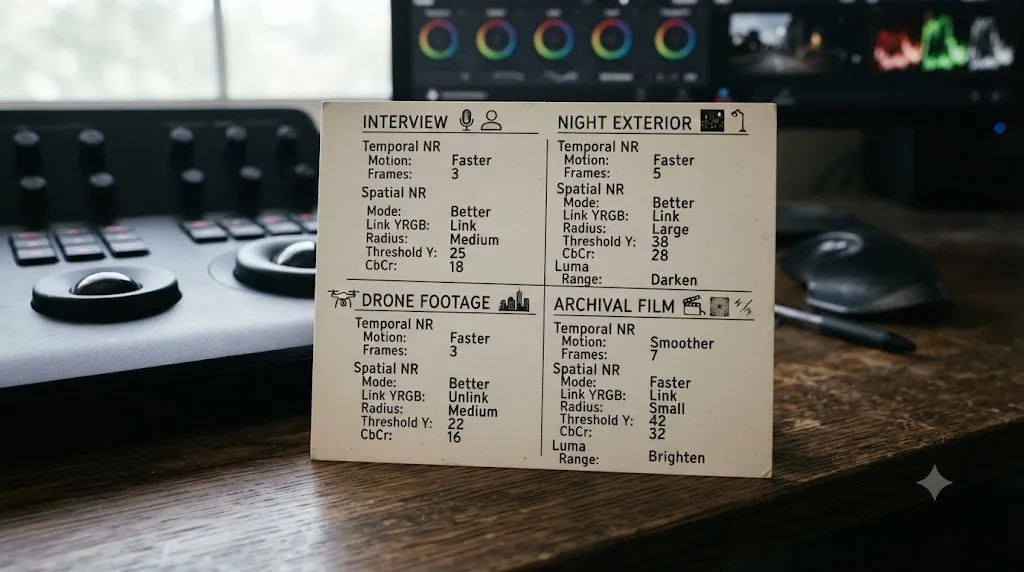
A cheat sheet, built from the control ranges above, for situations that come up constantly:
| Scenario | Temporal Frames | Motion Est. / Range | Luma Threshold | Spatial NR |
|---|---|---|---|---|
| Static tripod interview, good light | 2-3 | Faster / Small | 10-15 | Usually unnecessary |
| Handheld interview, dim room | 2 | Better / Medium | 25-35 | Light, Luma 10-15 |
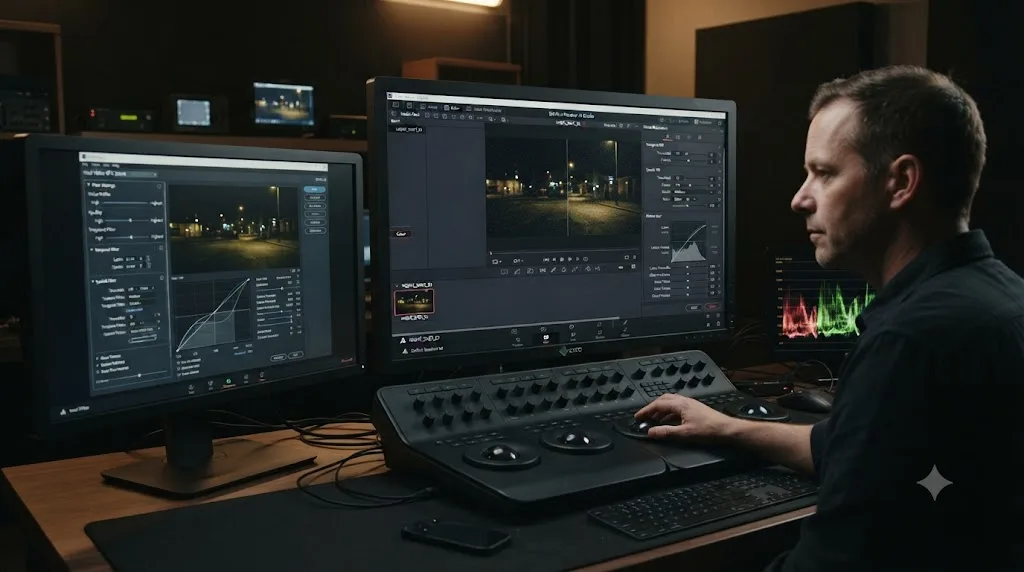
| Night exterior, moving camera | 1-2 | Better / Large | 30-40 | Moderate, Luma 15-25 |
| Drone or gimbal footage | 2 | Better / Medium | 15-25 | Usually unnecessary |
| Archival or digitized film scan | 0-1 (motion estimation unreliable on scanned grain) | None or Faster | Low, judge by eye | Primary tool here, Mode Enhanced |
| Screen recording or webcam, compression noise | 2 | Faster / Small | 15-20 | Light, mainly for macroblocking softness |
Treat every value in that table as a starting point to nudge from while watching the frame at 100 percent zoom, not a setting to trust blindly. The genuinely important habit is the one McGregor's tutorial demonstrates: judge each shot on its own noise, motion, and detail, and be willing to land somewhere well outside any table, including this one, when the footage calls for it.
A worked example: denoising a dark handheld interview
Say you've got a handheld interview shot on a mirrorless camera in S-Log3, ISO 6400, in a dimly lit room with one small practical light. On the timeline it looks flat, grainy, and slightly unstable from the handheld camera work.
- Normalize and balance first. Add your Color Space Transform node and your exposure/white balance node ahead of everything else, following the same order our color grading basics guide walks through. Judge nothing about the noise until the image is in its normal tonal range, since log footage can make grain look both better and worse than it will after normalization.
- Add a dedicated noise reduction node. New serial node, right after balance, labeled "NR." This keeps the heaviest node in your chain isolated and easy to bypass for comparison later.
- Enable Temporal NR at 2 frames. The handheld motion rules out pushing higher without risking ghosting. Set Motion Est. Type to Better, since the extra GPU cost is worth it for accurate tracking on a moving shot, and set Motion Range to Medium to match the moderate handheld movement.
- Raise Luma Threshold to around 30. ISO 6400 in a dim room is well into the "elevated noise" range from the table above, so start higher than you would on a well-lit static shot. Watch the shadows specifically, since that's where luma noise concentrates.
- Raise Chroma Threshold higher still, around 40-45. Underexposed footage pushed up in post tends to reveal blotchy color noise before luma noise becomes the bigger complaint, so decouple the two sliders and give Chroma more room.
- Check for ghosting at 100 percent zoom. Scrub the fastest hand gesture or head turn in the clip. If you see trailing, drop Number of Frames to 1 before touching anything else.
- Add light Spatial NR only if grain remains. A Luma Threshold around 10-15 with Mode set to Better usually finishes the job without visibly softening skin texture.
- Add a light Sharpen node after noise reduction. Following Heather Hay's advice from earlier in this guide, a small sharpening pass compensates for the softening any noise reduction method introduces, temporal, spatial, or AI-based alike.
- Cache the noise reduction node. Right-click it and enable node caching before you continue grading, since this is the most expensive node in the chain and the one most likely to make playback stutter from here on.
Nine steps, one dedicated node, and a result that holds up whether you're judging it on a laptop screen or a calibrated reference monitor.
What causes noise reduction to visibly do nothing?
Four causes, roughly in order of how often they trip people up:
The node is bypassed. Easy to miss after a session where you toggled it off to compare against the original and forgot to re-enable it. Check the node's bypass indicator, or press Ctrl+D / Cmd+D again to confirm you're actually viewing the processed result.
Threshold sliders are too low to matter. A Luma Threshold of 5 on a genuinely grainy shot is close to doing nothing, since the scale runs to 100 and low values apply the effect lightly by design. If you can't see any difference at all, you likely haven't pushed far enough yet, not that the tool isn't working.
You're judging it at a resolution that hides the noise. Timeline Proxy Mode or a lowered playback resolution scales the image down for display, which can hide fine grain the same way it hides fine detail. Switch Timeline Proxy Mode back to Full Resolution before judging whether noise reduction is doing anything, the same rule that applies whenever you're evaluating grain or sharpening.
Motion Threshold is set too low for a moving shot. Since Motion Threshold controls how much of the frame Temporal NR even touches (0 to 100, default 50), a value set too low on a shot with a lot of camera or subject movement can leave large parts of the frame untouched by the temporal analysis, even with strong Luma and Chroma thresholds dialed in elsewhere.
How does DaVinci Resolve's built-in noise reduction compare with Neat Video or Boris FX?
Fairly well for a normal grade, and it's already included in the Studio license you likely own if you're using it at all. That's a real advantage: no separate purchase, no extra plugin to install and maintain across version updates, and the noise reduction node sits in the same graph as the rest of your grade instead of living in a separate render pass.
Where dedicated third-party tools tend to pull ahead is on the harder cases: heavy grain from very high ISO or gain, archival and digitized footage with genuinely irregular noise structure, or situations where a colorist wants per-camera noise profiling rather than manually tuned sliders. Boris FX's Continuum plugin, for instance, documents its noise reduction as "comparing each pixel with the pixels in its immediate temporal and spatial neighborhood" and blending in pixels that are close in color while ignoring ones that are distant, a similar underlying concept to Resolve's own Temporal and Spatial tools, but packaged with additional presets and controls aimed specifically at difficult noise, rather than as one panel among many inside a full NLE. Boris FX's own tutorial content on grain removal in Resolve, written by Marco Sebastiano Alessi, makes a related honest point about the category as a whole: "The way noise reduction works is by adding artificial blur to the image, but that can turn into a very smudgy video" if it's overdone, which is exactly the tradeoff this whole guide has been walking through with Resolve's own sliders.
The honest framing: if Resolve's built-in Temporal and Spatial NR, tuned carefully per shot, clean up your footage to a standard you're happy with, there's no reason to add a second license and an extra render pass. Reach for a dedicated tool like Neat Video or Boris FX specifically when you've pushed Resolve's sliders as far as they reasonably go and the shot still isn't clean enough, which tends to happen on the worst-case footage, extreme low light, heavily damaged archival material, or extreme digital zoom, rather than on typical production work.
What's the fastest way to dial in noise reduction without wasting an evening?
Work through it in this order:
- Correct exposure and white balance first, so you're judging real noise, not noise hiding under a bad exposure.
- Add a dedicated node for noise reduction, separate from everything else in the chain.
- Enable Temporal NR first. Start at 2 frames, Motion Est. Type Better, Motion Range matched to the shot's actual movement.
- Raise Luma Threshold until visible grain drops out, then raise Chroma Threshold, usually higher than Luma.
- Check for ghosting at 100 percent zoom on the fastest motion in the shot. Lower Number of Frames if you see trailing.
- Add Spatial NR only if grain remains, keeping the threshold conservative to avoid the waxy look.
- Add a light Sharpen node afterward to recover detail the noise reduction softened.
- Cache the noise reduction node before you keep grading, since it's the single most GPU-expensive node you're likely to add.
Most footage gets clean with steps one through four alone. The rest of this guide exists for the shots that fight back, high ISO, heavy handheld motion, or footage that was already compressed hard before it reached your timeline. If it's the specific setting you're stuck on mid-grade rather than the whole workflow, TryUncle is built for exactly that gap, an AI tutor that looks at your actual Resolve window and points at the control instead of sending you hunting through a video for a ten-second answer.
Start with Temporal NR at 2 frames and a modest threshold, judge the result at full resolution against real motion, and only add Spatial NR for what's genuinely left over. That single habit, resisting the urge to max out every slider at once, is the difference between noise reduction that disappears into a clean image and noise reduction you can spot from across the room.
Frequently asked questions
- What's the difference between Temporal and Spatial noise reduction in DaVinci Resolve?
- Temporal NR compares each frame against its neighbors, averaging up to 5 frames to tell real detail from random noise, which preserves sharpness but costs more GPU time and can ghost on fast motion. Spatial NR only ever looks at the single frame on screen, which is cheaper and handles static or heavily compressed footage well, but softens detail faster if you push it.
- Does DaVinci Resolve's free version have noise reduction?
- No. Blackmagic Design reserves both Temporal NR and the AI-based Spatial NR (UltraNR) for DaVinci Resolve Studio, the same $295 one-time license that gates Magic Mask and the DaVinci Neural Engine. The free version's Color page doesn't show a Noise Reduction panel at all.
- What Number of Frames setting should I use for Temporal NR?
- Start at 2 or 3 out of the available 0-5 range and watch a moving part of the frame, like hair or a hand. If you don't see trailing or smearing, you can push toward 4 or 5 for a locked-off shot. Handheld or fast-motion footage usually needs to stay lower, at 1 or 2, to avoid ghosting.
- Why does noise reduction make my footage look waxy or plastic?
- An over-tightened Spatial threshold is the usual cause. Spatial NR blurs within each frame to smooth noise, and past a certain threshold it blurs skin texture and fine detail along with the grain. Pull the Luma and Chroma thresholds down until you can still see natural skin texture, then rely on Temporal NR to catch what's left.
- Should I apply noise reduction before or after color grading?
- Put it on its own node, placed after your basic exposure and white balance correction but before your creative look. Grading a noisy image first hides how much noise you actually have, and pushing contrast or saturation after noise reduction can reveal grain that the correction alone would have made worse.
- Does noise reduction slow down playback or export in DaVinci Resolve?
- Yes, more than almost any other single node. Temporal NR holds several full frames in GPU memory at once for comparison, which is the classic cause of stuttering playback and 'GPU memory is full' errors. Cache the node once you've dialed in the settings so Resolve doesn't recompute it on every pass.
- Is DaVinci Resolve's built-in noise reduction as good as Neat Video or Boris FX?
- For moderate noise on a normal grade, the built-in tool holds up well and costs nothing beyond the Studio license you likely already have. Dedicated plugins like Neat Video and Boris FX Continuum specialize in noise reduction alone and tend to win on heavy grain, archival footage, or when you need per-camera noise profiling, at the cost of a separate license and an extra render pass.
- What is UltraNR and how is it different from standard Spatial noise reduction?
- UltraNR is Blackmagic's AI-based spatial denoiser, added to the DaVinci Neural Engine. Instead of a fixed mathematical blur formula, it uses machine learning trained on noise patterns to separate grain from detail, which generally preserves texture better than the older Spatial NR algorithm at an equivalent threshold.
Sources
- DaVinci Resolve Reference Manual: Noise Reduction Controls
- DaVinci Resolve Studio product page (Blackmagic Design)
- How to Effectively Reduce Noise in DaVinci Resolve (PremiumBeat, Lewis McGregor)
- Five DaVinci Resolve 19 Features I'll Definitely Be Using (Frame.io Insider, Heather Hay)
- BCC Noise Reduction documentation (Boris FX Continuum)
- DaVinci Resolve Grain Removal Tutorial: 4 Methods (Boris FX, Marco Sebastiano Alessi)
- Hardware Recommendations for DaVinci Resolve (Puget Systems)
- DaVinci Resolve Studio 18.6 GPU Performance Analysis (Puget Systems)
- URSA Broadcast Tech Specs, gain and ISO range (Blackmagic Design)
- ALEXA 35 Brochure, exposure index range (ARRI)
- DaVinci Resolve - Tech Specs (Blackmagic Design)
Learn by doing, not watching
Learn Resolve inside Resolve.
TryUncle watches your screen and points at the exact control when you ask. No tabs, no timestamps, no rewatching tutorials.
Download free for MacKeep reading
Fixes · Jul 7, 2026 · 25 min
DaVinci Resolve GPU Memory Is Full: Every Real Fix
Why DaVinci Resolve throws 'GPU memory is full,' and which fixes actually work: timeline resolution, drivers, effects, and how much VRAM you need.

Guides · Jul 7, 2026 · 35 min
How to Color Grade in DaVinci Resolve: The Basics
Learn how to color grade in DaVinci Resolve: build a node chain, balance shadows and highlights with Lift, Gamma, and Gain, and read the scopes.
Comparisons · Jul 7, 2026 · 28 min
DaVinci Resolve Studio Price: Free vs. Studio Cost, Explained
DaVinci Resolve Studio costs $295, paid once, not monthly. Here's exactly what that buys, how it stacks up against Premiere Pro and Final Cut Pro, and who needs it.