Articles / Guidesupdated for DaVinci Resolve 21.0.2 (July 2026)
How to Color Match Different Cameras in DaVinci Resolve
Quick answer
Match different cameras in DaVinci Resolve by converting each camera's native color space to DaVinci Wide Gamut with Color Space Transform, then fine-tune with Color Match for chart shots or Shot Match for clip-to-clip corrections. Normalize first, balance exposure and white balance against the scopes, then apply one shared creative look last.
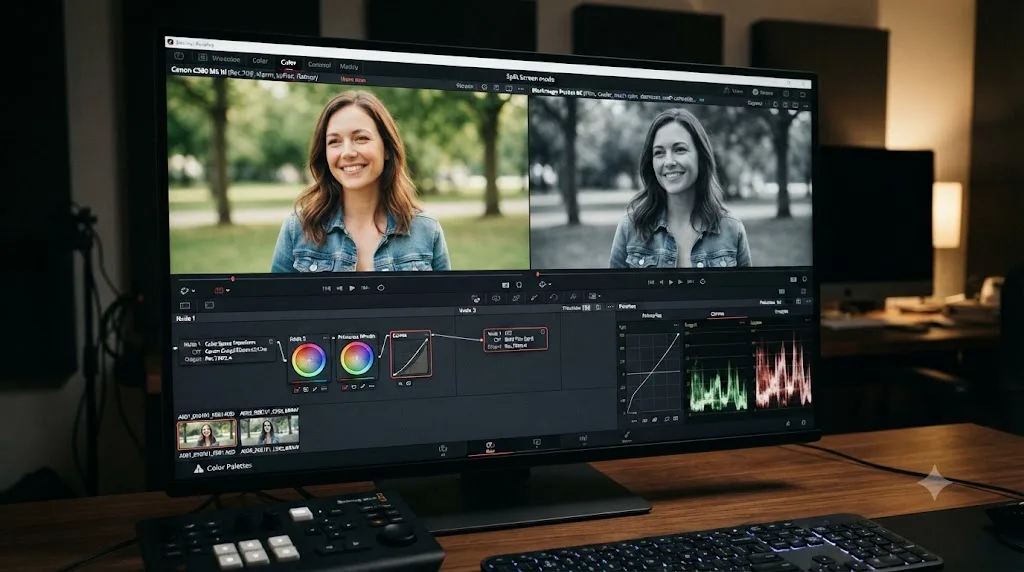
I've cut projects where two cameras shot the exact same subject, in the exact same light, three feet apart, and looked like they came from different decades once they hit the timeline. One ran warm and soft. The other ran cool and contrasty. Nobody touched a single grading tool yet. That's just what happens when two sensors and two color pipelines disagree about what "accurate" means.
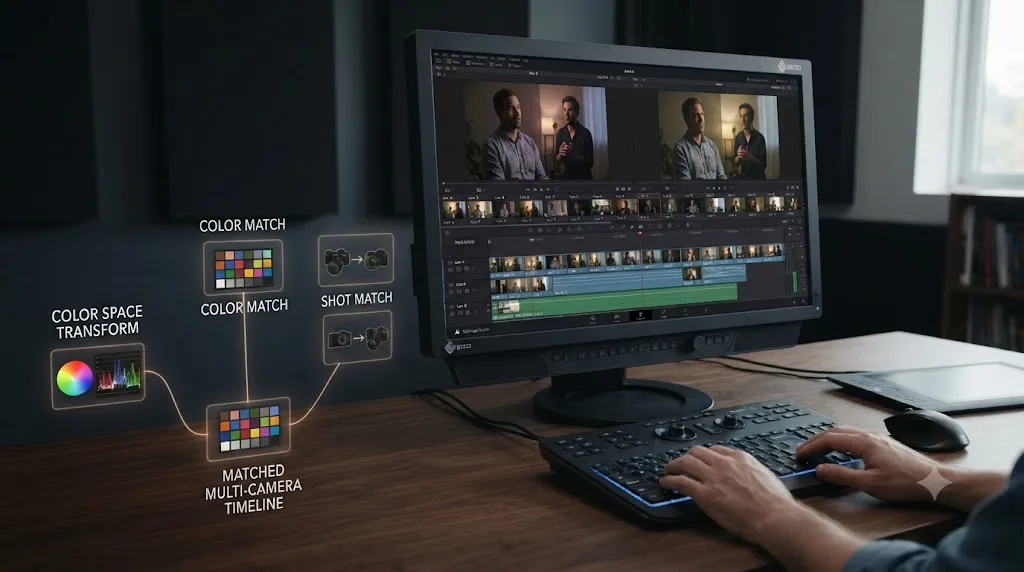
DaVinci Resolve gives you three real tools for fixing that: Color Space Transform, which converts a camera's native color science into a shared working space using math instead of guesswork; Color Match, which reads a physical color chart in your shot and builds a correction from measured values; and Shot Match, which skips all of that and just pushes one clip's color toward another's. None of them is the one tool that always wins. Which one you reach for depends on what you shot and how much you're willing to trust an algorithm's guess.
What does "color matching different cameras" actually mean in DaVinci Resolve?
It means making footage from two or more different camera models, sometimes different brands entirely, read as if it came from one consistent source once it's cut together. Not identical pixel for pixel, since lenses, lighting angles, and sensor sizes always introduce some real difference. Consistent enough that a viewer's eye reads it as one continuous scene instead of a jarring cut between two different looks.
That consistency has to happen before your creative grade, not instead of it. A teal-and-orange look applied to two cameras that already disagree about skin tone and contrast just makes the disagreement more visible, dressed up in a style. Camera matching is corrective work, not creative work, and it belongs earlier in your node graph than any look you're planning to apply. Get the correction right first, and the look you build afterward lands the same way on every angle.
The practical trigger for needing this workflow is almost always one of three situations: a documentary or interview shot on a primary camera and a secondary B-cam from a different manufacturer, a multicam event with three or four bodies that were never meant to match perfectly out of the box, or a project where footage arrives from multiple contributors on their own gear. Each situation uses the same underlying tools, just in a different order and with different starting assumptions about how far apart the cameras actually are.
Why do two cameras never match on their own?
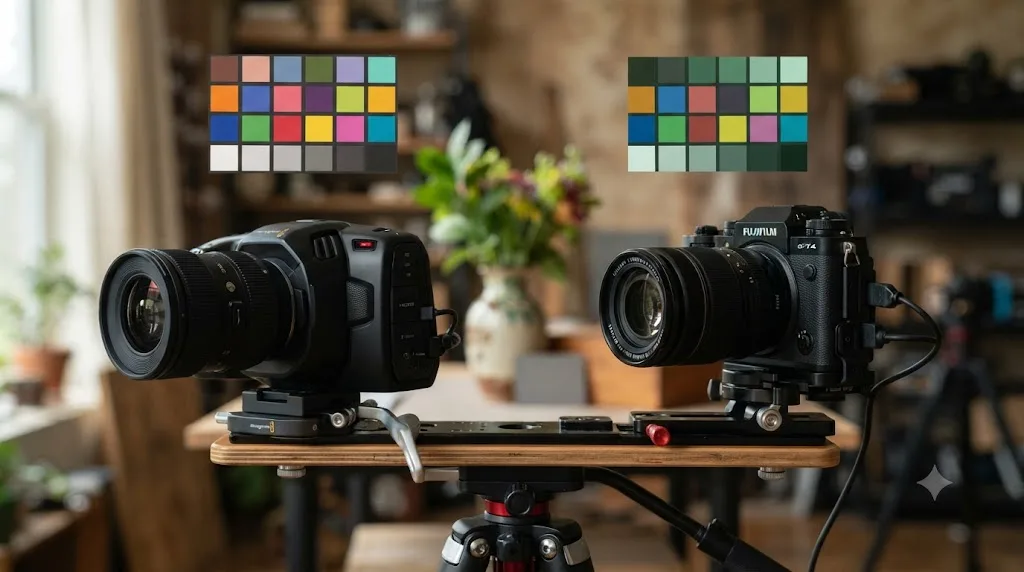
Because a camera's color isn't just its sensor. It's the sensor plus a manufacturer's specific mathematical interpretation of that sensor's raw data, and every manufacturer makes different choices there. Sony, Canon, Panasonic, and Blackmagic each built their own "color science," their own decision about how to translate photons into red, green, and blue values that look pleasing on a monitor. Point a Sony body and a Canon body at the same color chart under the same light, put both through a vectorscope, and the traces land in noticeably different places, even before either camera's log curve enters the picture.
Log profiles compound the problem instead of solving it. S-Log3, C-Log3, V-Log, and Blackmagic Design Film all exist to squeeze a camera's full dynamic range into a flat, low-contrast recording that protects highlight and shadow detail for grading later. But each manufacturer's log curve maps brightness and color differently, so two log-shot cameras don't even agree on what "flat" looks like before you've touched a single node. A camera's color science is fundamentally about how it interprets its own sensor's raw red, green, and blue primaries within a given color space, a distinction that explains why simply matching two clips' log curves by eye rarely closes the whole gap.
Two cameras recording the same white wall under the same light will produce measurably different RGB values, because color science lives in the sensor's interpretation, not just its exposure. That's the fact this entire guide exists to work around. Exposure and white balance differences are the easy 20 percent. The color science gap underneath them is the stubborn 80 percent, and it's why primary wheels alone, pushed by eye, rarely close the distance between two different camera systems without leaving a visible residue in skin tones or highlight rolloff.
| Source of mismatch | What it actually changes | Fixable with |
|---|---|---|
| Sensor and color science | The camera's fundamental interpretation of red, green, blue | Color Space Transform, matched to the correct input profile |
| Log curve | How brightness and contrast are compressed for recording | Color Space Transform's Input Gamma setting |
| Exposure and white balance | How bright and how warm the shot reads | Lift, Gamma, Gain, Temp, and Tint after normalization |
| Lens and lighting angle | Real optical and physical differences between cameras | Rarely fully correctable, treat as a creative constraint |
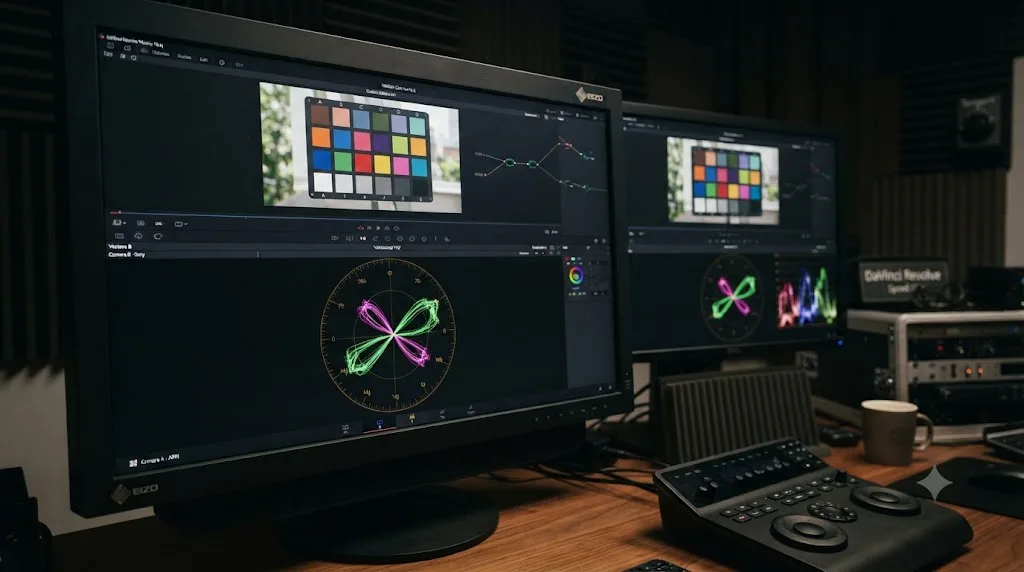
Which tool should you reach for: Color Match, Shot Match, or Color Space Transform?
This is the decision that determines how the rest of your session goes, so it's worth getting right before you touch a node.
| Tool | What it needs | What it does | Best for |
|---|---|---|---|
| Color Space Transform | Knowing your camera's exact input color space and gamma | Converts one color space into another using RCM's own math, before any creative decision | Normalizing every camera into one shared working space, the foundation step |
| Color Match | A physical color chart visible in the shot | Reads measured chart values and builds an automatic correction | Projects where you actually shot a chart on set, most accurate when available |
| Shot Match | Two clips, no chart required | Compares a reference clip to a target clip and pushes the target's color toward it | Fast single-node fixes on clips that are already close, or multicam stragglers |
None of these tools are mutually exclusive, and the workflow that actually holds up on a real multi-camera project usually uses two or three of them in sequence. Color Space Transform does the heavy lifting of getting every camera speaking the same language. Color Match gives you the most accurate possible starting point on any shot where you thought ahead and filmed a chart. Shot Match closes small remaining gaps fast, without you hunting through the parade scope by hand for every stray clip.
Color Space Transform solves the color science problem. Color Match and Shot Match solve the "close enough by eye isn't close enough" problem that's left over afterward. Skip the first step and the other two are fighting a bigger gap than they're built to close cleanly.
If you're brand new to Resolve's node system and haven't built a grade before, start with our color grading basics guide first. Everything below assumes you already know what a serial node is and how Lift, Gamma, and Gain behave.
How do you set up Resolve Color Management before you match anything?
Everything downstream depends on this five-minute setup, and skipping it is the single most common reason a camera-matching session drags on for hours instead of minutes.
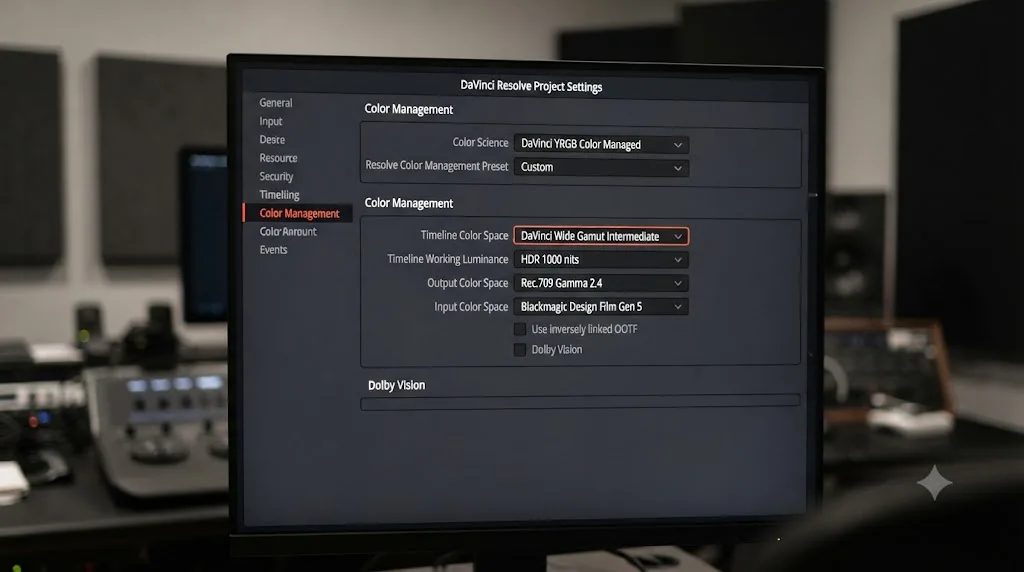
- Open Project Settings (the gear icon, bottom right of the interface) and go to the Color Management tab.
- Set Color Science to Resolve Color Management, if it isn't already. This activates the timeline-wide color space settings the rest of this workflow depends on.
- Set Timeline Color Space to DaVinci Wide Gamut Intermediate. This is Blackmagic's own log-encoded working space, deliberately oversized to hold color and dynamic range from essentially any camera without clipping before you've made a single grading decision.
- Set Output Color Space to your delivery target, typically Rec.709 Gamma 2.4 for standard web or broadcast delivery, or an HDR target if that's your final format.
- In the Media Pool, right-click each clip, or a group of clips from the same camera, and check Input Color Space. Resolve 20 and later expose a per-clip Input Color Space override here, which makes setting the correct input for mixed-camera projects faster than it used to be, since you don't have to touch a Color Space Transform node just to tag a clip correctly.
That fifth step is where mixed-camera projects live or die. A misidentified Input Color Space, even under color-managed settings, sends the wrong math down the pipe for that entire clip, and the error looks exactly like a bad grade rather than a bad tag, which is what makes it so easy to chase in the wrong place for twenty minutes.
Resolve Color Management exists specifically so you don't have to manually track every color space conversion by hand, clip by clip, on a mixed-camera project. That's the entire value proposition, and it's most valuable exactly where camera matching gets hardest: a timeline where four different sources are cut together and no single global correction fits all of them.
If you'd rather work with explicit Color Space Transform nodes instead of project-wide color management, that's a legitimate alternative covered in the next section, and it's actually the more common professional approach for mixed-camera work specifically, because it puts the conversion decisions directly in the node graph where you can see and troubleshoot them.
How do you match cameras with Color Space Transform, step by step?
This is the workflow that actually closes the color science gap, not just the exposure and white balance gap. It takes longer to set up than clicking Shot Match, and it's worth every minute of it on a project where two or more cameras are meaningfully different.
Colorist Cullen Kelly, describing his own approach to color management with nodes, put the underlying idea plainly: "Essentially, color management takes what the camera sees and transforms it into what your display can show," a framing that applies exactly as much to matching two cameras to each other as it does to matching one camera to a display.
- Group your clips by camera. In the Media Pool, select every clip from Camera A and put it in its own group, then do the same for Camera B, C, and any others. Right-click a group of selected clips and choose New Group, since everything from here forward gets set up once per group rather than once per clip.
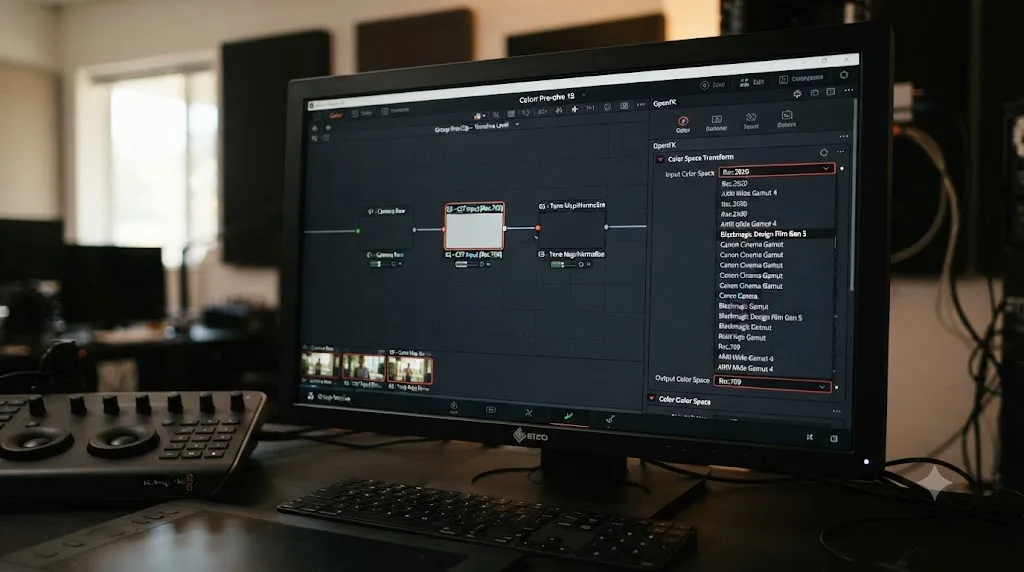
- Open the Color page and select a clip from your first camera group. At the top of the node editor, switch the level dropdown from Clip to Group Pre-Clip. Any node you build here applies to every clip in that group, automatically, without you touching each one individually.
- Add a Color Space Transform node. Drag Color Space Transform from the Effects Library, under ResolveFX Color, onto your Group Pre-Clip node.
- Set the Input Color Space and Input Gamma to your camera's exact recording profile. This is the step that has to be precise. A Sony camera shot in S-Log3 needs Input Color Space set to S-Gamut3.Cine and Input Gamma set to S-Log3, not a close approximation. Check your camera's manual or the clip's metadata if you're not certain which variant it recorded.
- Set the Output Color Space to DaVinci Wide Gamut and Output Gamma to DaVinci Intermediate. This lands every camera, regardless of its native format, in the same shared working space, which is the entire point of the exercise.
- Repeat steps 2 through 5 for every other camera group, each with its own correct Input Color Space and Input Gamma, all converging on the same DaVinci Wide Gamut Intermediate output.
- Switch to the Timeline level in the node editor and add a second Color Space Transform node, this time converting from DaVinci Wide Gamut Intermediate to your delivery output, typically Rec.709 Gamma 2.4.
- Grade normally from here. Every clip on the timeline, regardless of which camera shot it, now enters your correction nodes already speaking the same color language. A Lift, Gamma, and Gain move on the Clip level behaves consistently across cameras instead of needing a completely different touch on each one.
Once every camera is converted into the same working space through Color Space Transform, they all speak the same language before you've made a single creative decision. That single sentence is the whole reason this workflow exists, and it's why colorists reach for CST first on any project shooting more than one camera body, rather than trying to eyeball a match after the fact.
The Color Space Transform node itself does this with the same underlying math Resolve Color Management uses project-wide, exposing four dropdown menus for Input Color Space, Input Gamma, Output Color Space, and Output Gamma, plus tone mapping and gamut mapping controls for handling transforms between spaces with meaningfully different dynamic range. Building it as an explicit node, rather than relying on project-wide color management alone, gives you a visible, editable point in the graph where you can troubleshoot exactly which camera's transform is wrong if a match still isn't landing.
What Color Space Transform settings does each camera brand need?
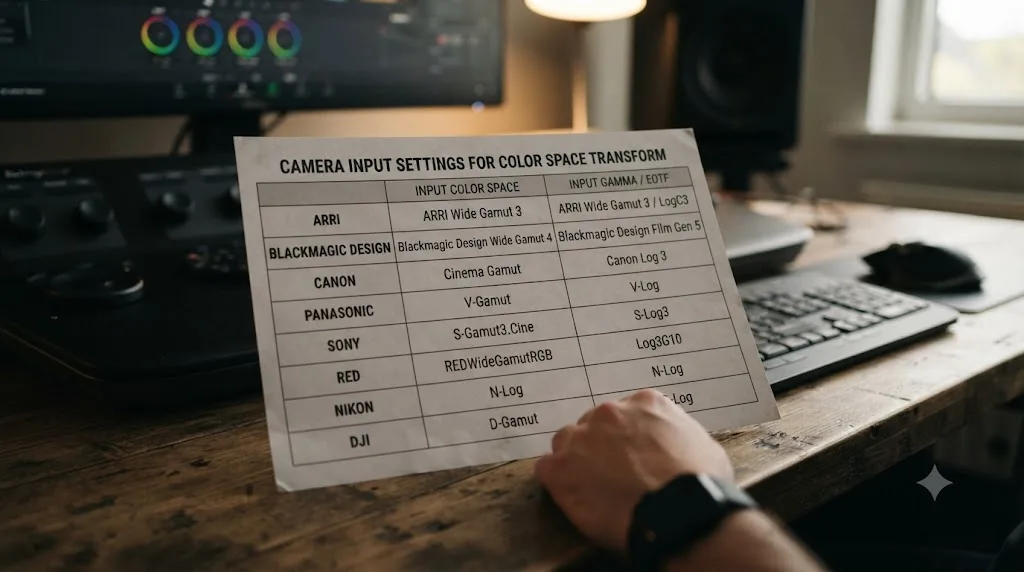
Getting the Input Color Space and Input Gamma exactly right is the difference between a clean transform and one that's close but visibly off. Here's the starting point for the cameras you're most likely to be mixing on a real shoot. Always confirm against your specific model's manual, since manufacturers frequently ship more than one log variant across their own lineup, and picking the wrong sibling profile produces a transform that looks almost right, which is worse than looking obviously wrong, because it's harder to catch.
| Camera / brand | Typical Input Color Space | Typical Input Gamma | Note |
|---|---|---|---|
| Sony (mirrorless, S-Log3 bodies) | S-Gamut3.Cine | S-Log3 | Some older Sony bodies shot S-Log2 instead, check your specific footage |
| Canon (Cinema EOS, C-Log3) | Cinema Gamut or BT.2020, depending on camera | C-Log2 or C-Log3 | Canon has shipped multiple C-Log variants across its lineup, confirm which your body recorded |
| Panasonic (V-Log bodies) | V-Gamut | V-Log | Consistent across most current Panasonic cinema and mirrorless bodies |
| Blackmagic Design cameras | Blackmagic Wide Gamut | Blackmagic Design Film, or the camera's Gen 5 Color Science equivalent | BRAW footage often decodes through the Camera Raw palette instead, handle separately |
| ARRI (Alexa, Amira) | ARRI Wide Gamut 3 | ARRI LogC3, or LogC4 on newer bodies | Disable Tone Mapping in the CST node when converting ARRI LogC3 to DaVinci Wide Gamut |
| RED (RAW) | REDWideGamutRGB | Log3G10 | Set Project Settings' Camera Raw tab to IPP2 color science first, before the CST node |
| iPhone, standard picture profile | Rec.709 | Rec.709 Gamma 2.4 | Not log footage, treat as already normalized, matching mostly needs exposure and white balance work |
| iPhone, Apple Log (recent Pro models) | Apple Log Gamut, or Rec.2020 depending on Resolve version | Apple Log | Apple Log support has expanded across recent Resolve versions, confirm your version lists it by name |
Source: settings compiled from documented Color Space Transform workflows for mixed-camera color management.
A Color Space Transform set to the wrong Input Color Space produces a result that's close but visibly wrong, and that's a more expensive mistake than skipping the transform entirely. A viewer, and especially a client, notices "something's slightly off about the skin tone" far faster than they notice flat, ungraded log footage, because the ungraded version reads as unfinished while the mistagged version reads as a bad creative decision.
One caution worth building into your workflow: wrong Color Space Transform settings produce a worse result than no transform at all, since a mistagged conversion actively distorts the color relationships in the image rather than simply leaving them flat and untouched. If you're not certain which log profile a clip actually recorded, check the camera's metadata or manual before guessing. A guess that's close is often harder to spot and fix than an obviously wrong one.
How do you use the Color Match tool with a color chart?
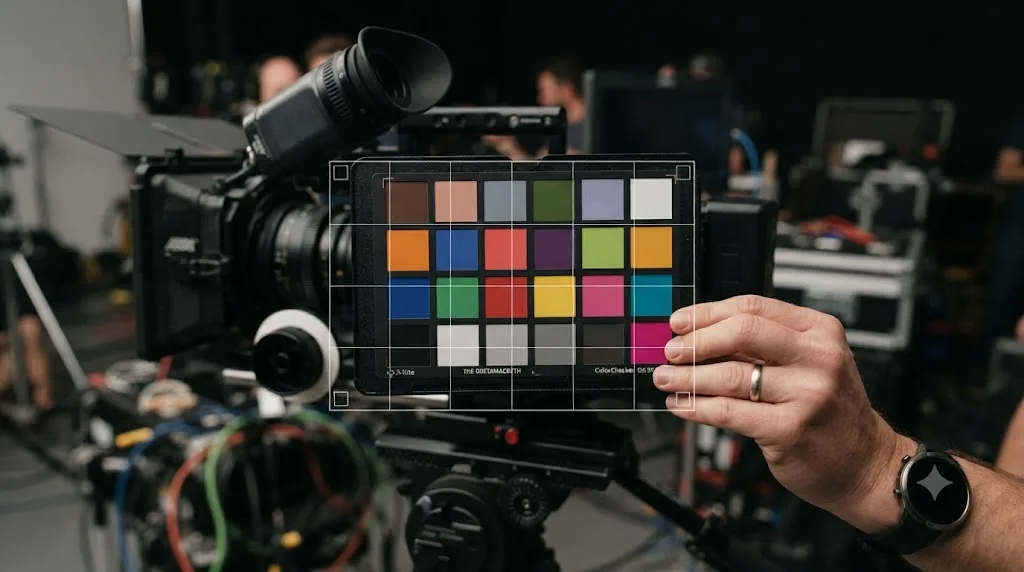
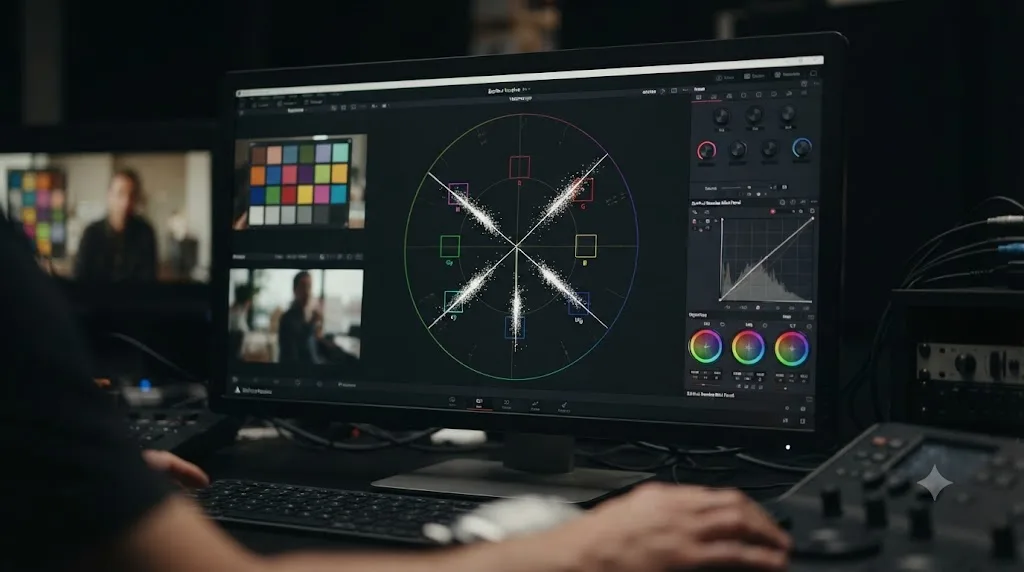
If you shot a color chart on set, an X-Rite ColorChecker, a DSC Labs OneShot, or a Datacolor SpyderCheckr held in front of each camera under the same lighting, Color Match gives you the most accurate automatic starting point Resolve offers. It works by superimposing a sampling grid over the chart in your clip and mathematically analyzing the sampled colors to generate an automatic correction, producing a neutral grade for the image that serves as a starting point for the rest of your grading work.
- On the Color page, select the clip that has the color chart visible in frame.
- Click the Color Match button, found in the palette selection row alongside the Primaries wheels and Curves.
- From the chart type dropdown, select the exact chart you used: X-Rite ColorChecker Classic, ColorChecker Video, ColorChecker Passport Video, DSC Labs ChromaDuMonde 24+4, DSC Labs SMPTE OneShot, or Datacolor SpyderCheckr 24. Picking the wrong chart type here breaks the whole correction, since Resolve is matching sampled values against a specific chart's known reference values.
- In the viewer, a grid overlay appears. Drag its four corner handles onto the four corner patches of the chart as it actually appears in your shot, so each sampling square lines up with the correct color patch underneath it.
- Set Source Gamma to the gamma your footage was actually recorded in, and set Target Gamma and Target Color Space to what you want the corrected clip to output. Getting Source Gamma wrong here undermines the whole correction the same way a wrong Input Gamma undermines a Color Space Transform.
- Click Match. Resolve analyzes the sampled chart values and applies an automatic correction based on them.
Repeat this on one representative clip per camera, not on every single clip, and use the resulting correction as your camera's baseline, the same way you'd use a hero-shot correction in a manual matching workflow.
A color chart shot on set turns camera matching from an educated guess into a measurement, which is the single biggest advantage Color Match has over every other tool in this guide. That's worth planning for on any shoot where you already know you're mixing camera bodies, since holding a chart in frame for five seconds per setup costs almost nothing on the day and can save real time in the color suite later.
Why does Color Match fail even when you followed the steps?
Here's the honest part most tutorials skip. Color Match doesn't always deliver the clean, automatic result its interface promises, and a fair number of working colorists have stopped relying on it for exactly that reason, according to a detailed critique from Mixing Light's Patrick Inhofer.
Part of the problem is a mismatch between what the tool actually optimizes for and what users expect it to do. Cinematographer Art Adams, who designed the DSC Labs OneShot chart specifically for this kind of work, explains that proper matching prioritizes something more specific than simply "looking right": "It's more important to ensure the colors fall on the correct 'vectors', which are lines drawn from the center of the vectorscope through each color box. If the colors fall on the proper vectors they are at least accurate, even if they aren't fully saturated." That's a meaningfully different goal than a viewer's intuitive sense of "does this look correct," and it's worth understanding before you trust an automatic Match click to finish the job.
A few concrete things go wrong in practice. Lighting on the chart itself has to be even and representative of the actual scene lighting, not a quick grab under different conditions than the rest of the shot, or the sampled values won't represent what your camera actually captured for the performers. The corner-handle alignment has to be genuinely precise, since even a slightly rotated or skewed grid samples the wrong pixels for each patch. And chart type selection matters more than it looks like it should: picking ColorChecker Classic when you actually shot ColorChecker Video sends the tool comparing your footage against the wrong reference values entirely.
Color Match gives you a mathematically measured starting point, not a finished correction, and treating its output as a final grade is the single most common reason colorists report disappointing results from it. Run Color Match, then look at the result on the scopes exactly as skeptically as you'd look at a manual correction. If the vectorscope trace for a known neutral patch isn't sitting where it should, adjust from there rather than assuming the automatic tool got it perfectly right.
None of this means skip Color Match. It means treat its output the same way you'd treat any other starting point in this guide: verified against the scopes, not trusted on faith because the button said "Match."
How do you use Shot Match to fix a straggler clip?
Once your cameras are normalized with Color Space Transform, or even without that step on shots that are already reasonably close, Shot Match is the fastest way to bring one clip in line with another. It's a single click and a single new node, and it's genuinely useful for exactly the job it's built for.
- Grade your reference clip, the one you want other clips to match, until it looks correct.
- Select the clip or clips you want to correct, either in the Color page's thumbnail timeline or, for matching several at once, in the clip node editor.
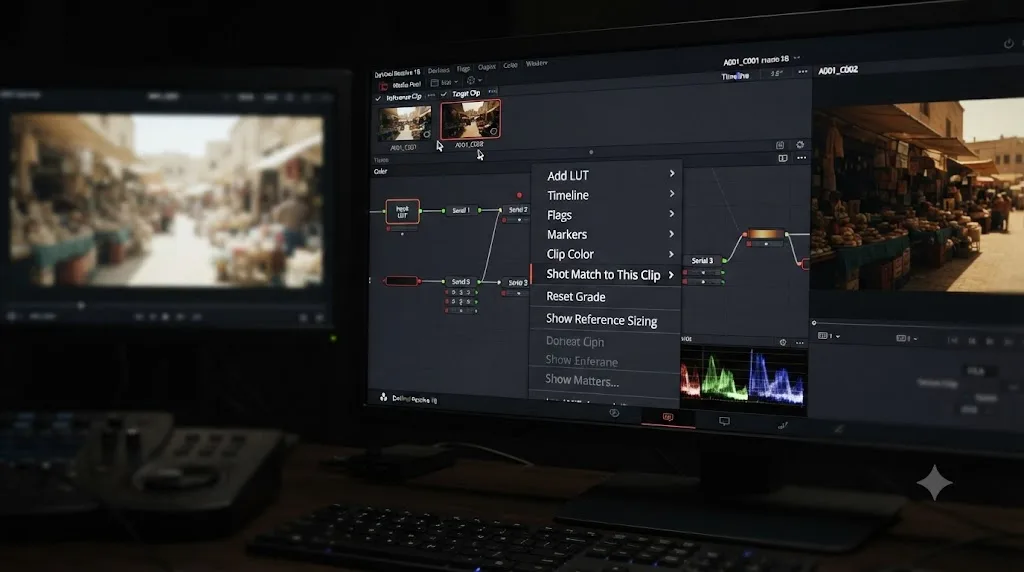
- Right-click your reference clip's thumbnail and choose Shot Match to This Clip.
- Wait a few seconds while Resolve analyzes both images and applies a correction. It adds a single corrector node to the target clip and adjusts Lift, Gamma, and Gain to bring it toward the reference.
Editor Larry Jordan draws a useful boundary around what to expect from this tool: "Shot Match isn't supposed to make your clips look good, it's supposed to make them look the same as the clip you choose to match to, or to at least get as close as possible without creating a color correction that will do harm to the image." That's a narrower, more honest job description than "automatically fix my mismatched footage," and it's the right expectation to carry into using it.
Resolve's clip node editor also makes Shot Match useful across a batch: select multiple target clips together in the node editor, right-click your reference, and the correction applies across the whole selection at once rather than one clip at a time. For a multicam interview with several stragglers from the same secondary camera, that batch behavior turns Shot Match into a genuine time-saver instead of a per-clip chore.
Shot Match adjusts Lift, Gamma, and Gain to push one clip's color toward another's, but it doesn't touch overall luminance the way a full grade would, so treat its result as a color correction, not a finished exposure match. If your reference and target clips are exposed noticeably differently, expect to follow Shot Match with a manual Gain adjustment, since the tool's job stops at color, not brightness overall.
If Shot Match's result looks wrong immediately after applying it, right-click the corrected node and choose Reset Node Grade to remove the correction cleanly and try again, ideally against a reference clip that's a closer starting match.
A worked example: matching a Sony FX3 and a Canon R5 on the same interview
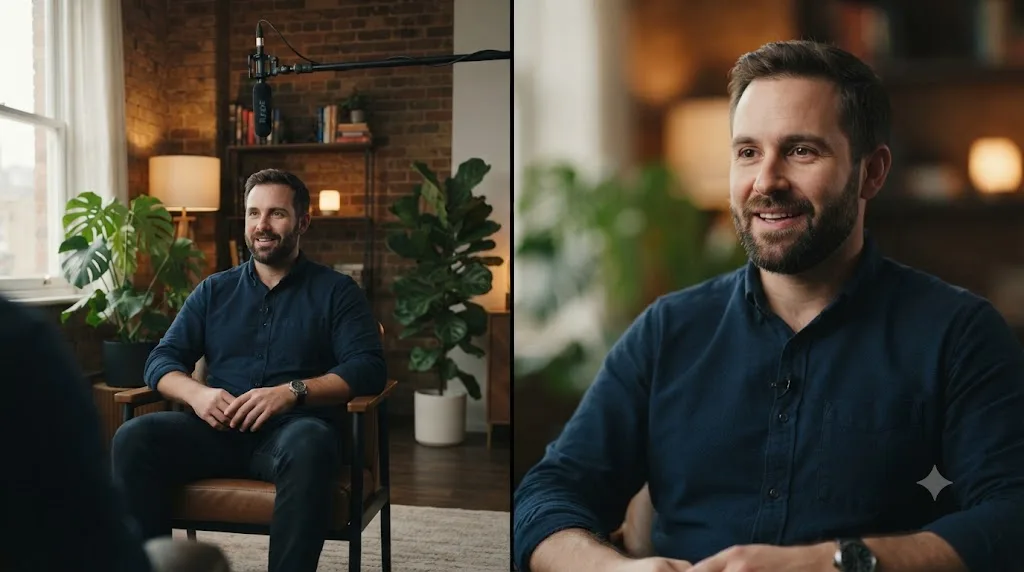
Theory holds together better with a concrete case in front of you. Say you're cutting a two-camera interview: a wide shot from a Sony FX3 in S-Log3, and a close-up from a Canon R5 in C-Log3, both pointed at the same subject under the same three-point lighting setup, no color chart shot on the day.
- Group the clips by camera. Select every FX3 clip in the Media Pool, group them as "Sony FX3." Select every R5 clip, group them as "Canon R5."
- Set the Sony group's Color Space Transform. At the Group Pre-Clip level for the FX3 group, add a CST node. Input Color Space: S-Gamut3.Cine. Input Gamma: S-Log3. Output: DaVinci Wide Gamut, DaVinci Intermediate.
- Set the Canon group's Color Space Transform. Same node, different group. Input Color Space: Cinema Gamut. Input Gamma: C-Log3. Output: DaVinci Wide Gamut, DaVinci Intermediate.
- Add the Timeline-level output transform. DaVinci Wide Gamut Intermediate to Rec.709 Gamma 2.4, applied once at the Timeline level, covering both cameras identically.
- Grade the Sony wide shot as your hero. Balance exposure with Lift and Gain, correct white balance against a neutral object in frame using the RGB parade, and settle saturation last. This clip is now your reference for everything downstream.
- Grab a still of the graded Sony shot and wipe it against the ungraded Canon close-up in the viewer. Even after both cameras' CST normalization, expect a visible gap, since normalization gets both cameras speaking the same language, not saying identical things.
- Check the gap on the parade scope specifically. With the wipe active, look at a shared neutral tone, ideally something visible in both shots like a gray backdrop or the subject's shirt collar if it's neutral colored. If the Canon clip's red channel sits meaningfully higher than the Sony reference's at the same tonal point, that's your correction target.
- Try Shot Match first. Right-click the graded Sony clip and choose Shot Match to This Clip on the Canon clip. Because both cameras are already normalized through CST, Shot Match usually only has a small remaining gap to close, and it does that in seconds.
- Check skin tone on the vectorscope. Enable the scope's skin tone indicator line and confirm both the Sony and Canon shots of the same subject's face fall close to that line. This is the check that catches what Shot Match's Lift, Gamma, and Gain math sometimes misses, since skin tone accuracy is a narrower target than general color agreement.
- Apply your creative look last, as a single node at the Timeline level, so it lands identically on both cameras rather than needing separate tuning per camera.
Ten steps, two cameras, no color chart needed because Color Space Transform did the heavy lifting and Shot Match closed what was left. That's the shape of the most common real-world version of this workflow: two different brands, log footage, no chart, normalize first, match second.
How do you color match cameras inside a multicam clip specifically?
Multicam clips add a wrinkle the workflow above doesn't cover on its own: each angle inside a multicam clip carries its own independent grade, unlike a simple take selector where every take shares one correction. That's actually good news for matching, since it means you can grade every angle to agree with each other before you ever cut a single edit point, rather than fixing color angle by angle after the edit is locked.
- Build your multicam clip as usual, syncing angles by timecode, waveform, or a manual reference point. If sync itself is drifting or landing wrong, our multicam sync guide covers that separately from the color problem this guide addresses.
- Right-click the multicam clip and choose Open in Timeline. This exposes every individual angle stacked on its own track, directly editable, which is the access point for grading angle by angle before your edit.
- Switch to the Color page and enable both the Clips and Timeline panels, so you can see each angle's individual position and select it directly.
- Turn on Unmix in the Viewer's lower left corner. With multiple angles stacked, Unmix shows you only the currently selected angle instead of whatever's stacked visually on top, which is essential once you're grading more than one angle in the same superimposed stack.
- Group your angles by camera, exactly as in the interview example above, and apply Color Space Transform at the Group Pre-Clip level per camera if your angles come from different camera models.
- Grade one angle as your hero, using Lift, Gamma, and Gain against the scopes as usual.
- Match the remaining angles against the hero, using Shot Match for a fast pass or manual scope-based correction for anything Shot Match doesn't fully close.
- Return to the Edit page using the path control at the bottom left corner of the timeline, and resume cutting your multicam edit with every angle already color matched.
Larry Jordan's own summary of why this order matters is worth repeating directly: "The BIG benefit to color grading a multicam clip before editing is that you only need to grade the master shots, rather than each individual shot after the edit." That's a genuinely different amount of work. Grading four angles once, before editing, versus grading dozens of individual cut segments after the edit is locked, is the difference between an afternoon and a week on a multi-camera project with a lot of angle switching.
Grading a multicam clip's angles before you edit means you correct each camera exactly once, not once per cut, no matter how many times the edit switches between angles later. That's the entire reason the workflow above starts with Open in Timeline before touching a single wheel, rather than editing first and discovering the color mismatch cut by cut afterward.
One detail worth knowing if you flatten the multicam clip later: the Edit page gives you a choice between Copying Multicam Grades, which bakes the grade you just built into each flattened segment, and Retaining Grades from Angles, which keeps the original per-angle grade instead. Copying Multicam Grades is almost always what you want after doing the work above, since it preserves the matched result you just spent time building.
How do you confirm a camera match with the scopes instead of your eyes?
Your eyes adapt to whatever camera's look you looked at five seconds ago, which makes them genuinely bad judges of whether two cameras actually match. A wipe comparison on your monitor can look convincing and still hide a real gap the scopes would catch instantly.
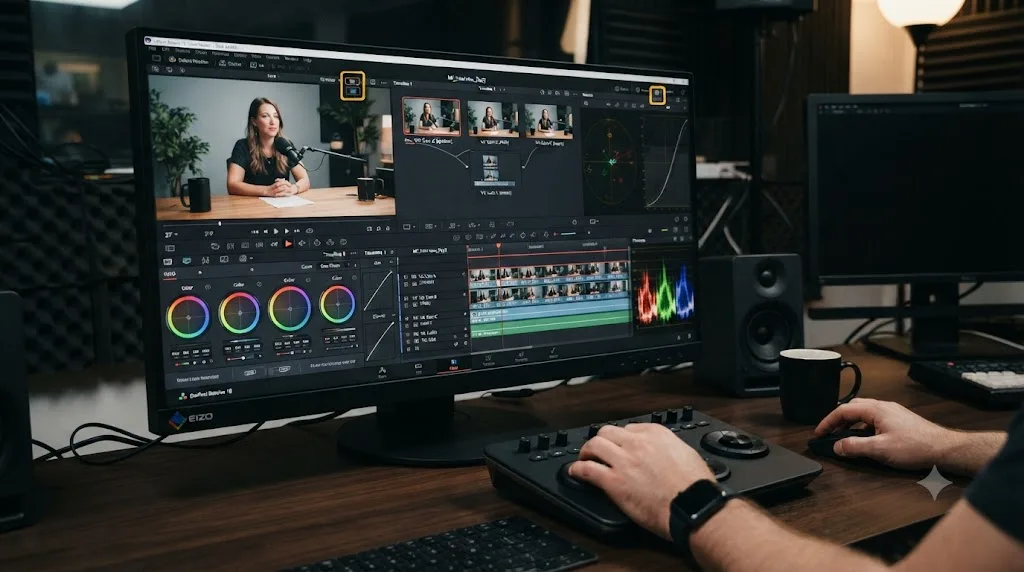
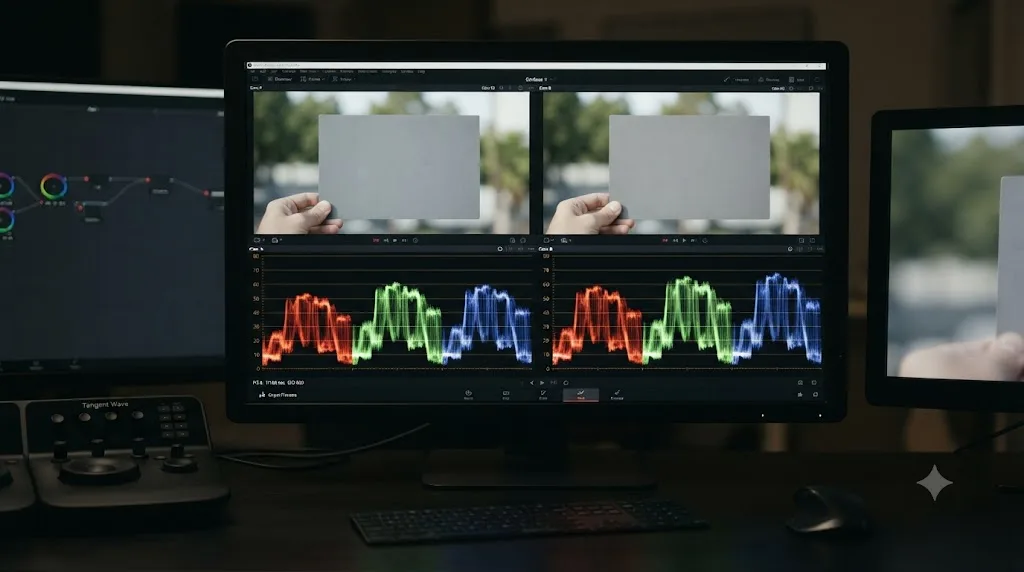
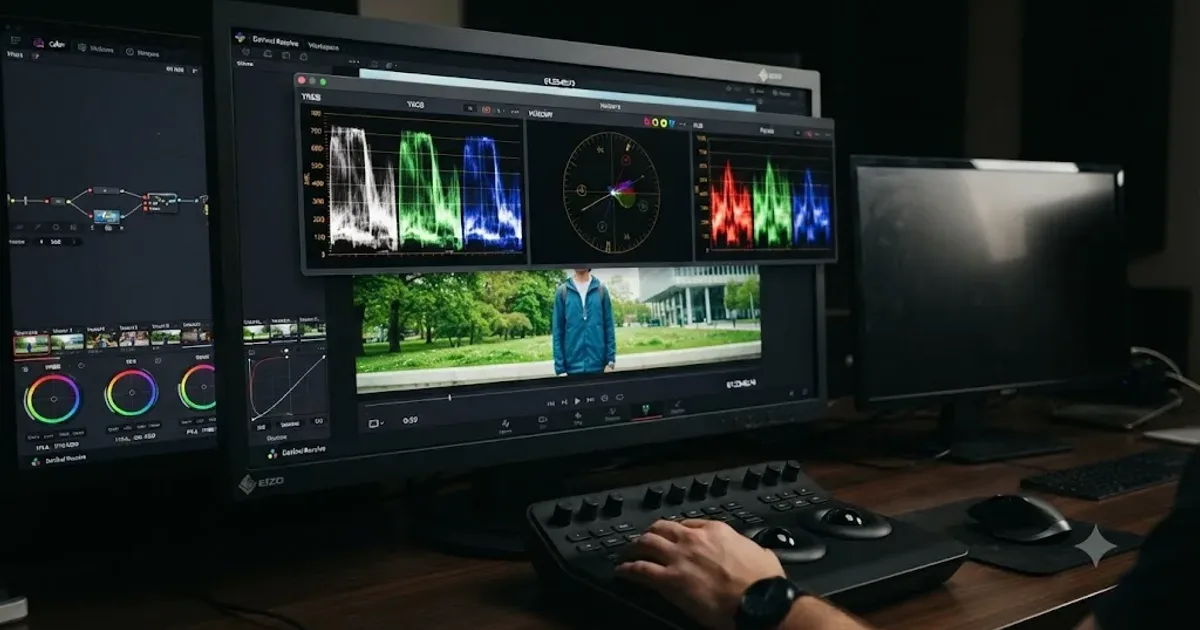
The RGB parade is your primary check. Find something visible in both cameras' footage that should read as the same neutral or near-neutral tone, a gray card, a white shirt, a plain wall. In a genuine match, the red, green, and blue traces for that object sit at the same height on the parade regardless of which camera captured it. If Camera A's red trace rides consistently higher than Camera B's at the same tonal point, that's a residual color science gap your correction hasn't fully closed yet, even if the two shots look close by eye.
The vectorscope's skin tone indicator is your second check, and it's the one that catches problems the parade sometimes misses, since it's specifically tuned to the narrow band of hues human skin actually falls into. Enable it in the scope's settings menu, and confirm that a subject's face reads close to that diagonal line regardless of which camera shot them. A trace that drifts noticeably off that line on one camera but not the other means your match still has work left, even if the general color balance looks reasonable elsewhere in the frame.
A camera match that looks correct on your monitor but shows disagreeing parade traces on a shared neutral object is not actually matched, it's a coincidence of your current viewing conditions. That's worth internalizing early, because it's the gap between a match that survives a client review on a different screen and one that only ever looked right in your grading suite.
If you're not yet comfortable reading these scopes fluently, our guide to reading DaVinci Resolve's waveform and vectorscope covers the fundamentals this section assumes you already have.
What do you do when you have no color chart and no clean log footage?
Sometimes you're handed footage after the fact, a contributor's clips, a guest camera operator's card, a phone recording shot in a standard picture profile rather than log, with no chart anywhere in the material and no way to reshoot a reference. Both Color Match and a clean Color Space Transform setup depend on information you simply don't have here. That doesn't mean the footage is unmatchable, it means you're working with the manual method instead of the automated ones.
- Open the RGB Parade and Vectorscope, and treat them as your primary reference for the entire process, since you have no chart or clean log profile to lean on as a shortcut.
- Build a primary correction on your best-matched reference clip using Lift, Gamma, and Gain, setting a clean black point and a clean white point against the waveform.
- Grab a still of that graded reference.
- Wipe the still against each mismatched clip, one at a time, in the viewer.
- Match the black point first. Pull the mismatched clip's Lift until its shadow region sits at the same height on the waveform as the reference's.
- Match the white point second, using Gain the same way against the highlight region.
- Correct white balance using the parade. If the destination clip's red channel is higher in the highlights than the reference, pull red Gain down on the destination until the traces agree at that tonal range.
- Match saturation last, adjusting until the vectorscope's overall spread and the skin tone indicator, if a face is visible, roughly agree between the two clips.
- Save the corrected clip as a new still, and use it, alongside your original reference, as a matched pair for grading any other footage from that same unidentified source.
This manual path takes longer than Color Space Transform or Color Match, because you're doing by hand what those tools would otherwise calculate for you. It's also completely viable. Every technique in it, black point, white point, parade-based white balance, vectorscope-based saturation, is the same fundamental skill covered in our color grading basics guide, just applied specifically to closing the gap between two mismatched sources instead of building a single camera's primary grade.
If the mismatched footage turns out to actually be log, just unidentified, check its waveform shape before assuming you're stuck with the fully manual path. Flat, compressed contrast sitting in the middle of the scale is a strong sign it's log footage that a generic Color Space Transform, even an approximate one like Rec.709 in and a common log gamma out, might partially normalize before you finish the manual pass.
A worked example: a three-camera live event with mismatched sensors
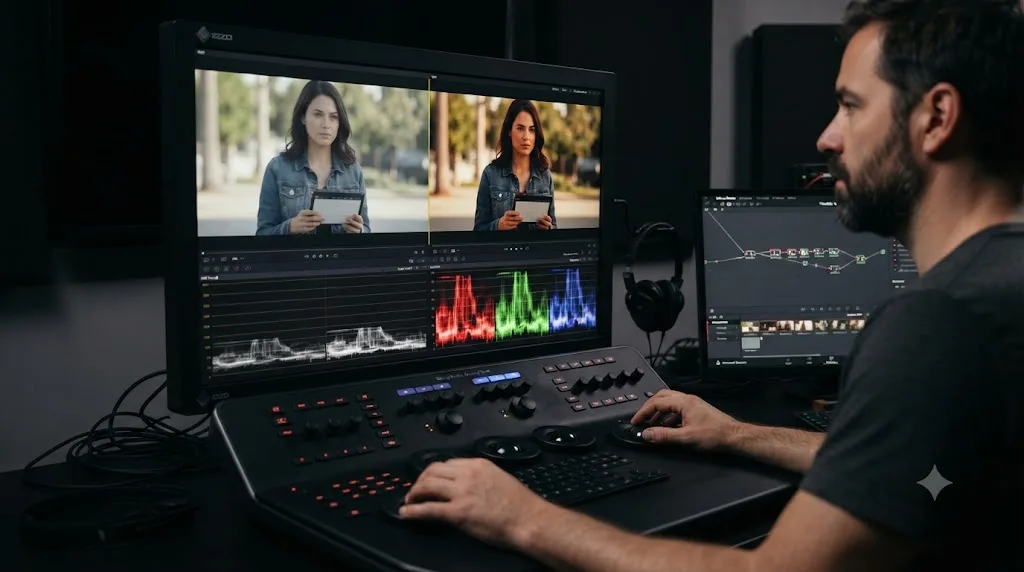
Here's a messier, more realistic case than a controlled two-camera interview: a live panel discussion shot on three bodies, a professional cinema camera for the wide, a mirrorless body for a tight moderator shot, and a small action camera clamped to the podium for a low-angle audience reaction shot. All three are different sensors, different color science, and the action camera shot in a flat, non-standard profile with no clean documentation of its exact color space.
- Identify what you actually know about each camera. The cinema camera and mirrorless body both have documented log profiles, easy to look up. The action camera's flat profile is proprietary and undocumented, so you're not getting a clean Color Space Transform setup for that one.
- Normalize the two documented cameras first. Group them, apply Color Space Transform at the Group Pre-Clip level with each camera's correct Input Color Space and Input Gamma, output to DaVinci Wide Gamut Intermediate, exactly as in the two-camera example above.
- Treat the action camera manually. Since its profile isn't cleanly identifiable, build a primary correction on it directly using Lift, Gamma, and Gain against the waveform, rather than guessing at Color Space Transform settings that are more likely to be wrong than helpful.
- Grade the cinema camera's wide shot as your hero, since it's the most controlled, best-lit angle and the one viewers will spend the most time on.
- Match the mirrorless moderator shot against the hero using Shot Match first, since both cameras are already normalized into the same working space and the residual gap is likely small.
- Match the action camera manually against the same hero, using the parade and vectorscope process from the previous section, since Shot Match's underlying assumption, that both clips are already in a broadly compatible space, is weaker here.
- Pay specific attention to the action camera's highlight rolloff. Small action cameras frequently clip highlights more aggressively than cinema or mirrorless bodies, and no amount of color matching recovers detail that was never captured. Accept a slightly different highlight character on that angle rather than chasing an impossible match.
- Group all three cameras' final corrections, and apply the event's creative look as one shared node at the Timeline level, so a single adjustment updates all three angles together if the client requests a change later.
The shape of this example differs from the earlier two-camera case in one important way: not every source gets the same treatment, because not every source gives you the same information to work with. Two cameras get the full Color Space Transform treatment. One gets manual correction because that's genuinely the more reliable option given what you know about it. Matching three or more cameras rarely means applying one identical workflow to every source, it means applying the right tool to each source based on what you actually know about it. Forcing a Color Space Transform with a guessed Input Color Space onto the action camera would likely produce a worse result than the honest manual correction did.
What goes wrong when matching cameras, and how do you fix it?
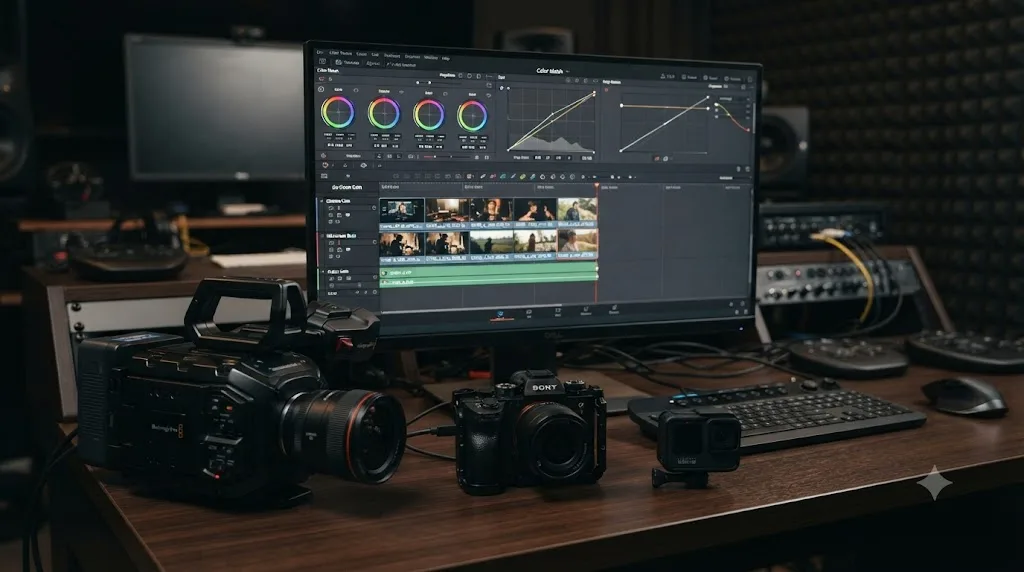
These cover nearly every "my cameras still don't match" report, in roughly the order they come up in practice.
The match looked right on your monitor, then looked wrong on a client's screen. You judged the match by eye instead of on the scopes. Go back to the RGB parade and check a shared neutral tone across both cameras directly, since a monitor's own calibration and your eyes' adaptation can both hide a real mismatch that the scopes will catch immediately.
Color Space Transform made things look close but subtly off, especially in skin tones. Almost always a wrong Input Color Space or Input Gamma, not a flaw in the tool itself. Double-check your camera's exact log profile against its manual or the clip's own metadata rather than assuming the obvious-sounding option is correct, since manufacturers frequently ship several closely named variants.
Color Match's automatic correction didn't produce a convincing result even with a chart clearly visible in frame. Check three things in order: that you selected the correct chart type in the dropdown, that the sampling grid's corner handles are precisely aligned to the chart's actual corner patches, and that the chart itself was evenly lit under representative scene lighting rather than grabbed quickly under different conditions. Any one of those being off undermines the whole correction.
Shot Match's result looks like it did real damage to the image instead of a clean correction. Right-click the corrected node and choose Reset Node Grade, then try again against a reference clip that's genuinely closer to the target to start with. Shot Match works by pushing Lift, Gamma, and Gain toward a reference, and a reference that's too far from the target in the first place gives the tool a harder problem than it's built to solve cleanly.
Two cameras matched fine in SDR but fell apart the moment the project moved to an HDR deliverable. Camera matching principles carry over to HDR, but the nit-scaled scopes and the HDR palette's contrast behavior change how you judge a match once you're grading past 100 nits of headroom. Our HDR grading guide covers that specific transition in detail if your matched multi-camera project is also an HDR deliverable.
One camera's footage clips highlights that the other camera holds onto easily. This usually isn't a color match problem at all, it's a genuine dynamic range difference between sensors, and no correction invents detail that was never captured. Accept the difference on that specific highlight range rather than chasing a match the footage itself doesn't support, and consider a subtle power window to protect the weaker camera's highlights instead.
A grade that matched two cameras during the color session looks mismatched again after export. Check your Deliver page's Data Levels and color space and gamma tag settings under Advanced Settings before assuming the grade itself broke. A codec or metadata mismatch between your project settings and your render settings can shift the exported image relative to what you approved on the timeline, the same failure mode that affects any Resolve export, not just multi-camera projects specifically.
Matching worked on individual clips but fell apart once cut into a multicam sequence. Confirm you actually graded the multicam clip's angles through Open in Timeline before editing, rather than grading standalone clips that later got pulled into a separate multicam build. A multicam clip's individual angle grades don't automatically inherit corrections made on the same footage elsewhere in your project.
Do you need DaVinci Resolve Studio to match cameras?
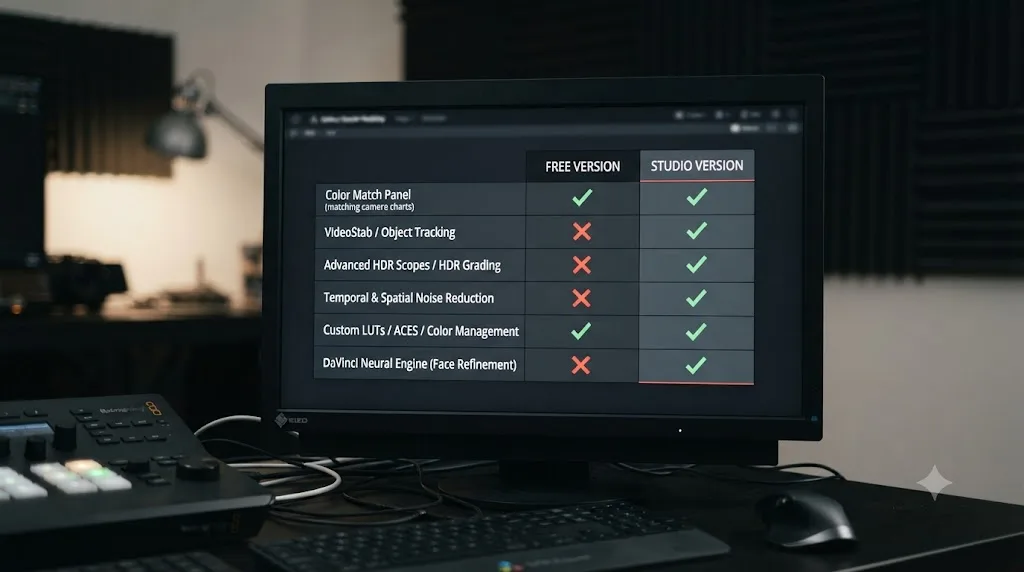
No, not for a standard multi-camera match. Color Space Transform, Color Match with every supported chart type, Shot Match, groups, stills, and the full scope suite, waveform, parade, vectorscope, histogram, and CIE Chromaticity, are all available in the free version. Everything covered in this guide runs without a Studio license.
What Studio adds that's genuinely relevant here is Magic Mask, the neural-engine-powered tool that automatically isolates a person or object without manually drawing and tracking a power window. It doesn't change how camera matching itself works, but it speeds up the selective, per-region correction that sometimes follows a base match, correcting one camera's skin tone specifically without dragging a window over a moving subject by hand. Our Magic Mask guide covers when it earns its keep over a plain tracked power window.
| Capability | Free version | Studio |
|---|---|---|
| Color Space Transform, all inputs and outputs | Yes | Yes |
| Color Match, all supported chart types | Yes | Yes |
| Shot Match, single clip and multi-clip selection | Yes | Yes |
| Groups, stills, and PowerGrades | Yes | Yes |
| Full scope suite | Yes | Yes |
| Manual power windows and tracking | Yes | Yes |
| Magic Mask automatic subject isolation | No | Yes |
| Advanced HDR grading and metadata tools | No | Yes |
Every tool this guide covers for matching cameras runs in the free version of DaVinci Resolve, and Studio's relevant addition is speed on selective corrections, not a capability you're missing without it. If your project is a standard SDR multi-camera match, license cost isn't the blocker. Knowing your camera's exact color space and gamma is.
Does camera matching work differently on Windows, Mac, Linux, or hardware?
The workflow itself, the nodes, the dropdown menus, the scope readings, is identical across every platform Resolve runs on. Ctrl becomes Cmd and Alt becomes Option on a Mac, the same substitution that applies throughout Resolve regardless of what you're doing.
The real platform differences that affect a camera-matching session live in decode performance and monitoring, not in the color tools themselves. A project mixing RAW formats from two different camera brands, say Blackmagic RAW alongside RED RAW, asks a lot of your GPU regardless of operating system, and per Blackmagic's own tech specs, Resolve wants meaningfully more VRAM as your timeline resolution and node count climb. Mixed-format multicam grading, with several Color Space Transform nodes stacked per camera group, is exactly the kind of session that benefits from headroom beyond the bare minimum.
Hardware-accelerated decode also varies by platform and license in ways that matter more on a mixed-camera project than a single-camera one, since you're potentially decoding several different codecs simultaneously while wiping between angles. On Windows, hardware-accelerated H.264 and H.265 decoding is reserved for the Studio version, which means free-version users on Windows lean harder on the CPU when mixing phone or drone footage with cinema camera originals. On Mac, Apple silicon decodes H.264, H.265, and ProRes in hardware regardless of license, which keeps a mixed-format multicam session more responsive on the free version specifically. On Linux, the free build has historically shipped without H.264, H.265, or AAC support at all, which affects mixed-format footage more than single-camera-format projects, since you're more likely to be juggling several codecs at once.
None of the color matching tools in this guide behave differently across operating systems, but a mixed-camera, mixed-codec timeline stresses decode performance harder than a single-camera project, and that performance gap does vary by platform and license. If wipe comparisons between cameras are stuttering while you're trying to judge a match, that's a decode and playback problem layered on top of the color problem, and our choppy playback guide covers the fixes for that specifically, separate from anything in this guide.
One monitoring note that applies everywhere regardless of platform: judge your final match on a properly calibrated reference display connected through supported I/O hardware where possible, not a laptop's built-in screen at whatever brightness it happens to be set to. A close match on an uncalibrated laptop panel can reveal itself as not close at all the moment it's viewed on reference-grade equipment.
Which DaVinci Resolve version added which camera-matching tools?
Camera matching tools in Resolve have evolved across several versions, which matters if you're following an older tutorial or working on a machine that hasn't been updated in a while.
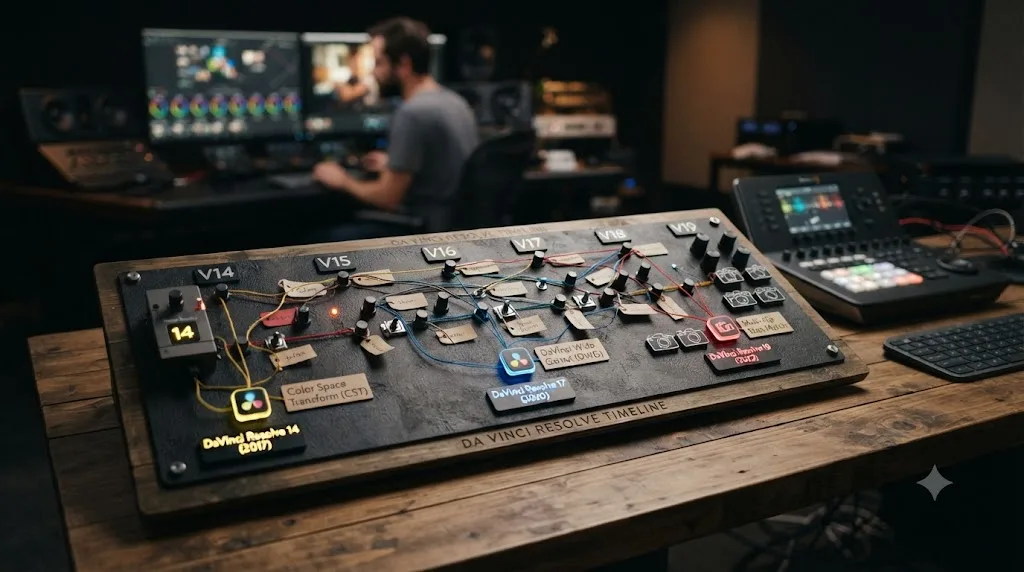
| Tool or feature | Status | Note |
|---|---|---|
| Color Space Transform node | Present in Resolve for many versions, refined since | Core to every mixed-camera workflow in this guide |
| DaVinci Wide Gamut and DaVinci Intermediate | Introduced in Resolve 17 | The recommended shared working space for Color Space Transform's output |
| Color Match palette, multiple chart types | Present across recent versions, expanded chart support over time | Check your specific version's chart dropdown for currently supported models |
| Shot Match, single clip | Long-standing feature | The right-click "Shot Match to This Clip" workflow |
| Shot Match, multi-clip selection in the node editor | Added in Resolve 20 | Select several target clips together in the clip node editor before right-clicking your reference |
| Per-clip Input Color Space override in the Media Pool | Added in Resolve 20 | Speeds up tagging mixed-camera footage without building a manual CST node just to set input space |
If you're working from a tutorial or forum post describing Shot Match as a strictly single-clip tool, it likely predates Resolve 20's multi-clip node editor selection. If DaVinci Wide Gamut Intermediate isn't listed as an option in your Color Space Transform dropdowns at all, you're on a version older than Resolve 17, and it's worth updating before attempting a serious mixed-camera project, since the shared working space that makes this entire workflow clean simply didn't exist yet.
Where do you go from here?
Normalize first with Color Space Transform, using your camera's exact Input Color Space and Input Gamma, not a close guess. Match second, with Color Match if you shot a chart, Shot Match if you didn't and the gap is small, or the manual parade-and-vectorscope method if you have neither a chart nor clean log metadata to work with. Confirm every match on the scopes, not your monitor, before you trust it. Apply your creative look last, as one shared node, so it lands the same way across every camera instead of needing separate tuning per source.
A multi-camera project that's properly matched at the correction stage lets you spend your grading time on the creative look, instead of noticing a skin tone disagreement every time the edit cuts between angles. That's the entire payoff of doing this work in the right order. Skip it, and you're not saving time, you're just moving the same work later, where it's harder to fix and easier for a client to spot.
If you're mid-session and can't remember which dropdown holds Input Gamma or which chart type matches the reference card you're actually holding, TryUncle is an AI tutor built to watch your actual Resolve window and point straight at the control you're hunting for, on the Color page specifically, rather than sending you back to a guide like this one to reread a whole section for one setting. And once your cameras are matched and your grade is locked, our color grading basics guide picks up exactly where this one leaves off, covering the node structure, curves, and scene-matching passes that turn a correction into a finished look.
Frequently asked questions
- What's the fastest way to match two different cameras in DaVinci Resolve?
- If both clips are already reasonably balanced, right-click your reference clip and choose Shot Match to This Clip on the clip you want to correct. It's a one-click, single-node fix. If the two cameras are wildly different, in different log profiles, or come from different sensors entirely, Shot Match alone usually isn't enough. Normalize both with Color Space Transform first, then use Shot Match or a manual scope-based correction to close the remaining gap.
- Is Color Match better than Shot Match for matching different cameras?
- They solve different problems. Color Match needs a physical color chart, like an X-Rite ColorChecker or a DSC Labs OneShot, visible in the shot, and it builds a correction from measured chart values. Shot Match needs no chart at all; it compares two clips directly and pushes one toward the other. Color Match is more accurate when you actually shot a chart on set. Shot Match is faster and more forgiving when you didn't.
- Do I need a color chart to match cameras in DaVinci Resolve?
- No. A chart gives Color Match a measured reference to correct against, which is the most accurate starting point, but it only works on shots where you actually filmed one. Without a chart, use Color Space Transform to normalize each camera's log or RAW profile into a shared working space, then match remaining differences with Shot Match or by eye against the parade and vectorscope.
- Why does Color Space Transform still leave my cameras looking different?
- Almost always a wrong Input Color Space or Input Gamma setting, not a flaw in the tool. CST needs the exact profile your camera actually recorded, not a close guess. Check your camera's manual or metadata for the precise log profile name, since Sony alone ships several S-Log variants and picking the wrong one produces a transform that's close but visibly off, especially in skin tones and highlight rolloff.
- Can I match cameras without DaVinci Resolve Studio?
- Yes. Color Match, Shot Match, Color Space Transform, groups, stills, and the full scope suite are all available in the free version. What Studio adds is Magic Mask for automatic subject isolation, which helps with selective per-region matching on a moving subject, and the more advanced HDR and neural engine tools. A standard multi-camera SDR match needs none of that.
- Does Shot Match work across a whole multicam clip at once?
- Shot Match works on individual clips or on multiple clips selected together in the clip node editor, not automatically across every angle in a multicam clip in one pass. To match multicam angles, right-click the multicam clip, choose Open in Timeline to expose the individual angles, and apply Shot Match or a manual correction to each stray angle against your reference camera.
- What input color space and gamma should I use in Color Space Transform for my camera?
- Match the exact profile you shot in: Sony mirrorless bodies commonly use S-Gamut3.Cine with S-Log3, Canon uses Cinema Gamut or BT.2020 with C-Log2 or C-Log3 depending on the camera, Panasonic uses V-Gamut with V-Log, and Blackmagic cameras use Blackmagic Wide Gamut with Blackmagic Design Film or the camera's Gen 5 Color Science equivalent. Check your specific camera model's documentation, since manufacturers frequently ship more than one log variant across their own lineup.
Sources
- DaVinci Resolve - Color (Blackmagic Design)
- DaVinci Resolve - Studio (Blackmagic Design)
- DaVinci Resolve - What's New (Blackmagic Design)
- DaVinci Resolve 18.6 Reference Manual: Color Space Transform [CSt] (Blackmagic Design, mirrored)
- DaVinci Resolve 18.6 Reference Manual: The Input, Timeline, and Output Color Space (Blackmagic Design, mirrored)
- DaVinci Resolve 18.6 Reference Manual: Identifying the Input Color Space of Different Clips (Blackmagic Design, mirrored)
- DaVinci Resolve 18.6 Reference Manual: Color Match Palette (Blackmagic Design, mirrored)
- DaVinci Resolve 18.6 Reference Manual: Grading Multicam Clips (Blackmagic Design, mirrored)
- How to Color Match Shots in DaVinci Resolve 20, by Larry Jordan
- The Secret to Color Grading Multicam Clips in DaVinci Resolve 20, by Larry Jordan
- How to Color Manage using Nodes in DaVinci Resolve, by Cullen Kelly (Frame.io Insider)
- Why is Camera Matching with Color Charts So Hard?, by Patrick Inhofer, featuring Art Adams (Mixing Light)
- Blackmagic Forum: How to Match Colors Between Two Clips in Resolve 20?
- DaVinci Wide Gamut and DaVinci Intermediate: Why Blackmagic Built Its Own Color Space (cinapex)
- The Complete Guide to Shot Matching in DaVinci Resolve (cinapex)
- DaVinci Resolve - Tech Specs (Blackmagic Design)
Learn by doing, not watching
Learn Resolve inside Resolve.
TryUncle watches your screen and points at the exact control when you ask. No tabs, no timestamps, no rewatching tutorials.
Download for MacKeep reading

Guides · Jul 7, 2026 · 35 min
How to Color Grade in DaVinci Resolve: The Basics
Learn how to color grade in DaVinci Resolve: build a node chain, balance shadows and highlights with Lift, Gamma, and Gain, and read the scopes.
Guides · Jul 10, 2026 · 30 min
How to Read DaVinci Resolve Scopes: Waveform and Vectorscope
Learn to read DaVinci Resolve's waveform, RGB Parade, and vectorscope: what balanced exposure, white balance, and skin tone actually look like on each.
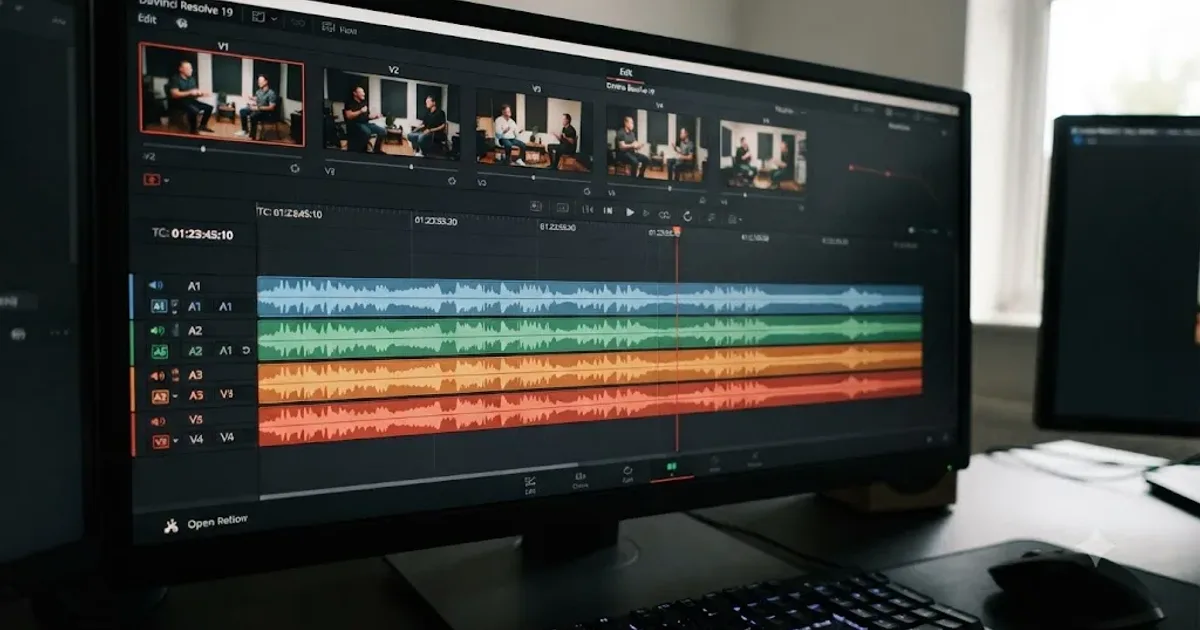
Fixes · Jul 8, 2026 · 26 min
DaVinci Resolve Multicam Sync Off by Frames: Every Fix
Multicam clip off by frames or drifting worse over time? Fix DaVinci Resolve's waveform mis-sync, frame rate drift, and timecode gaps, angle by angle.